
Creating a Dedicated Sending Domain for Emails
PART I: Setting Up Your Dedicated Domain (Step-by-Step Directions with Screenshots):
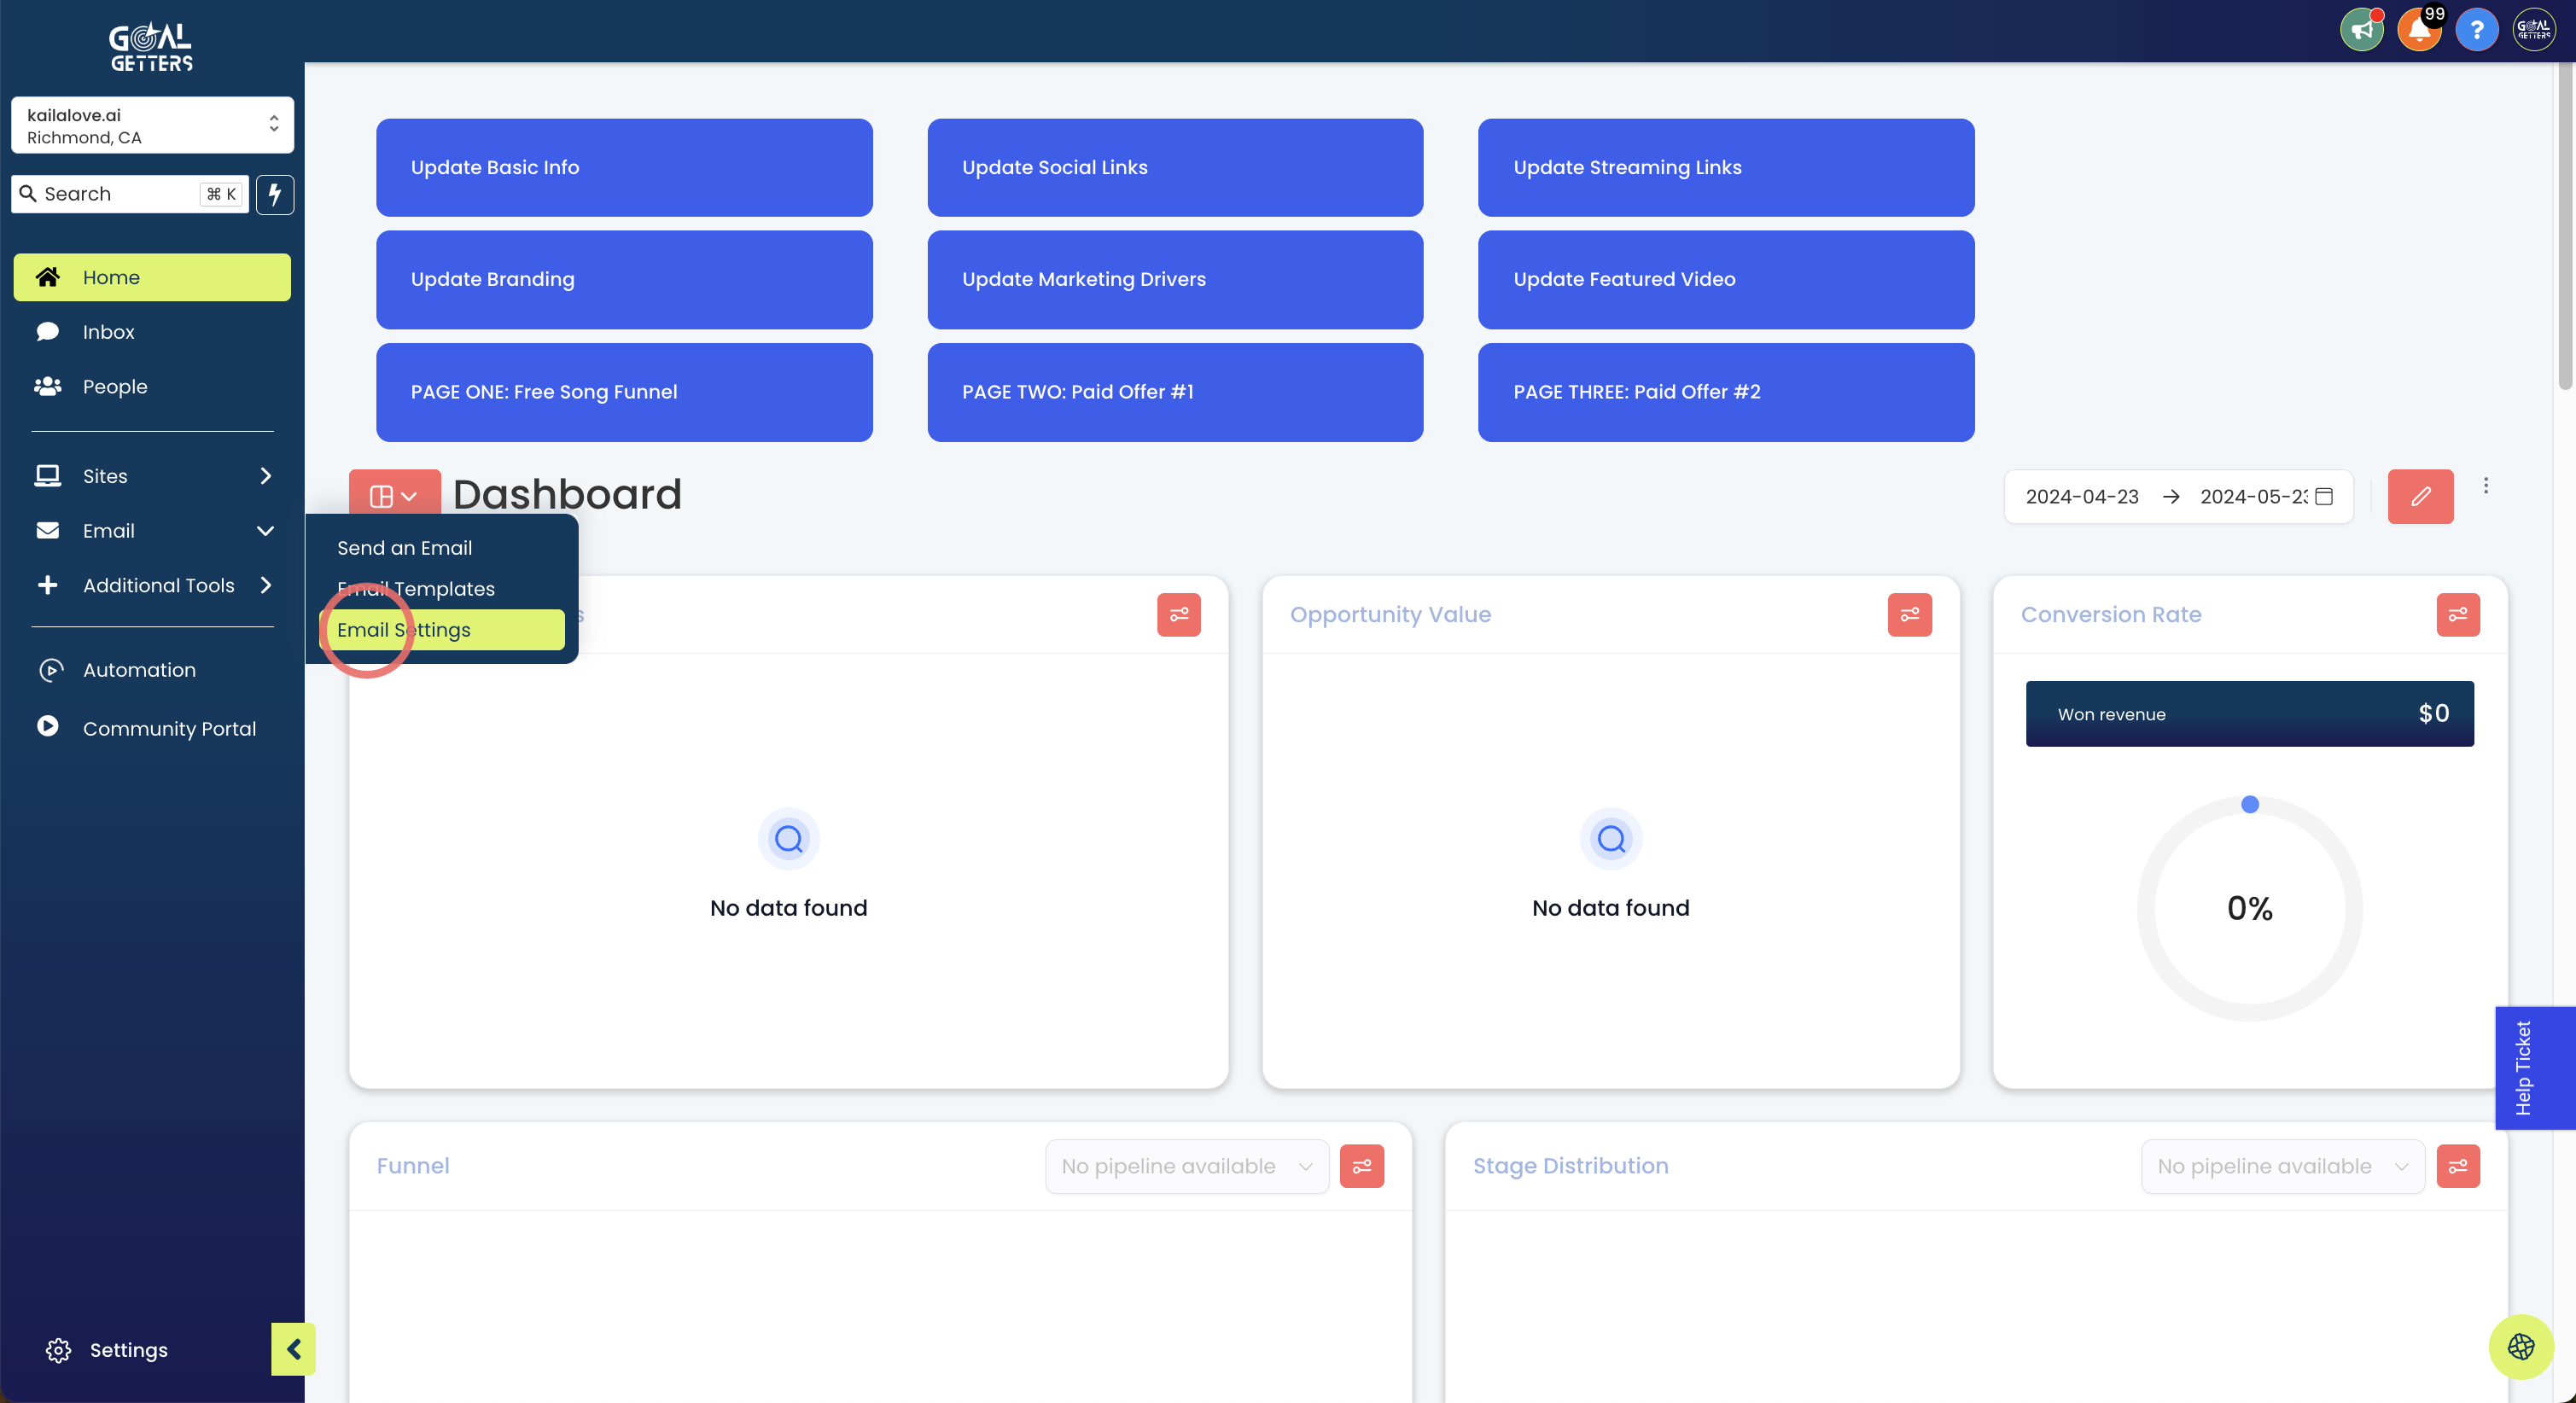
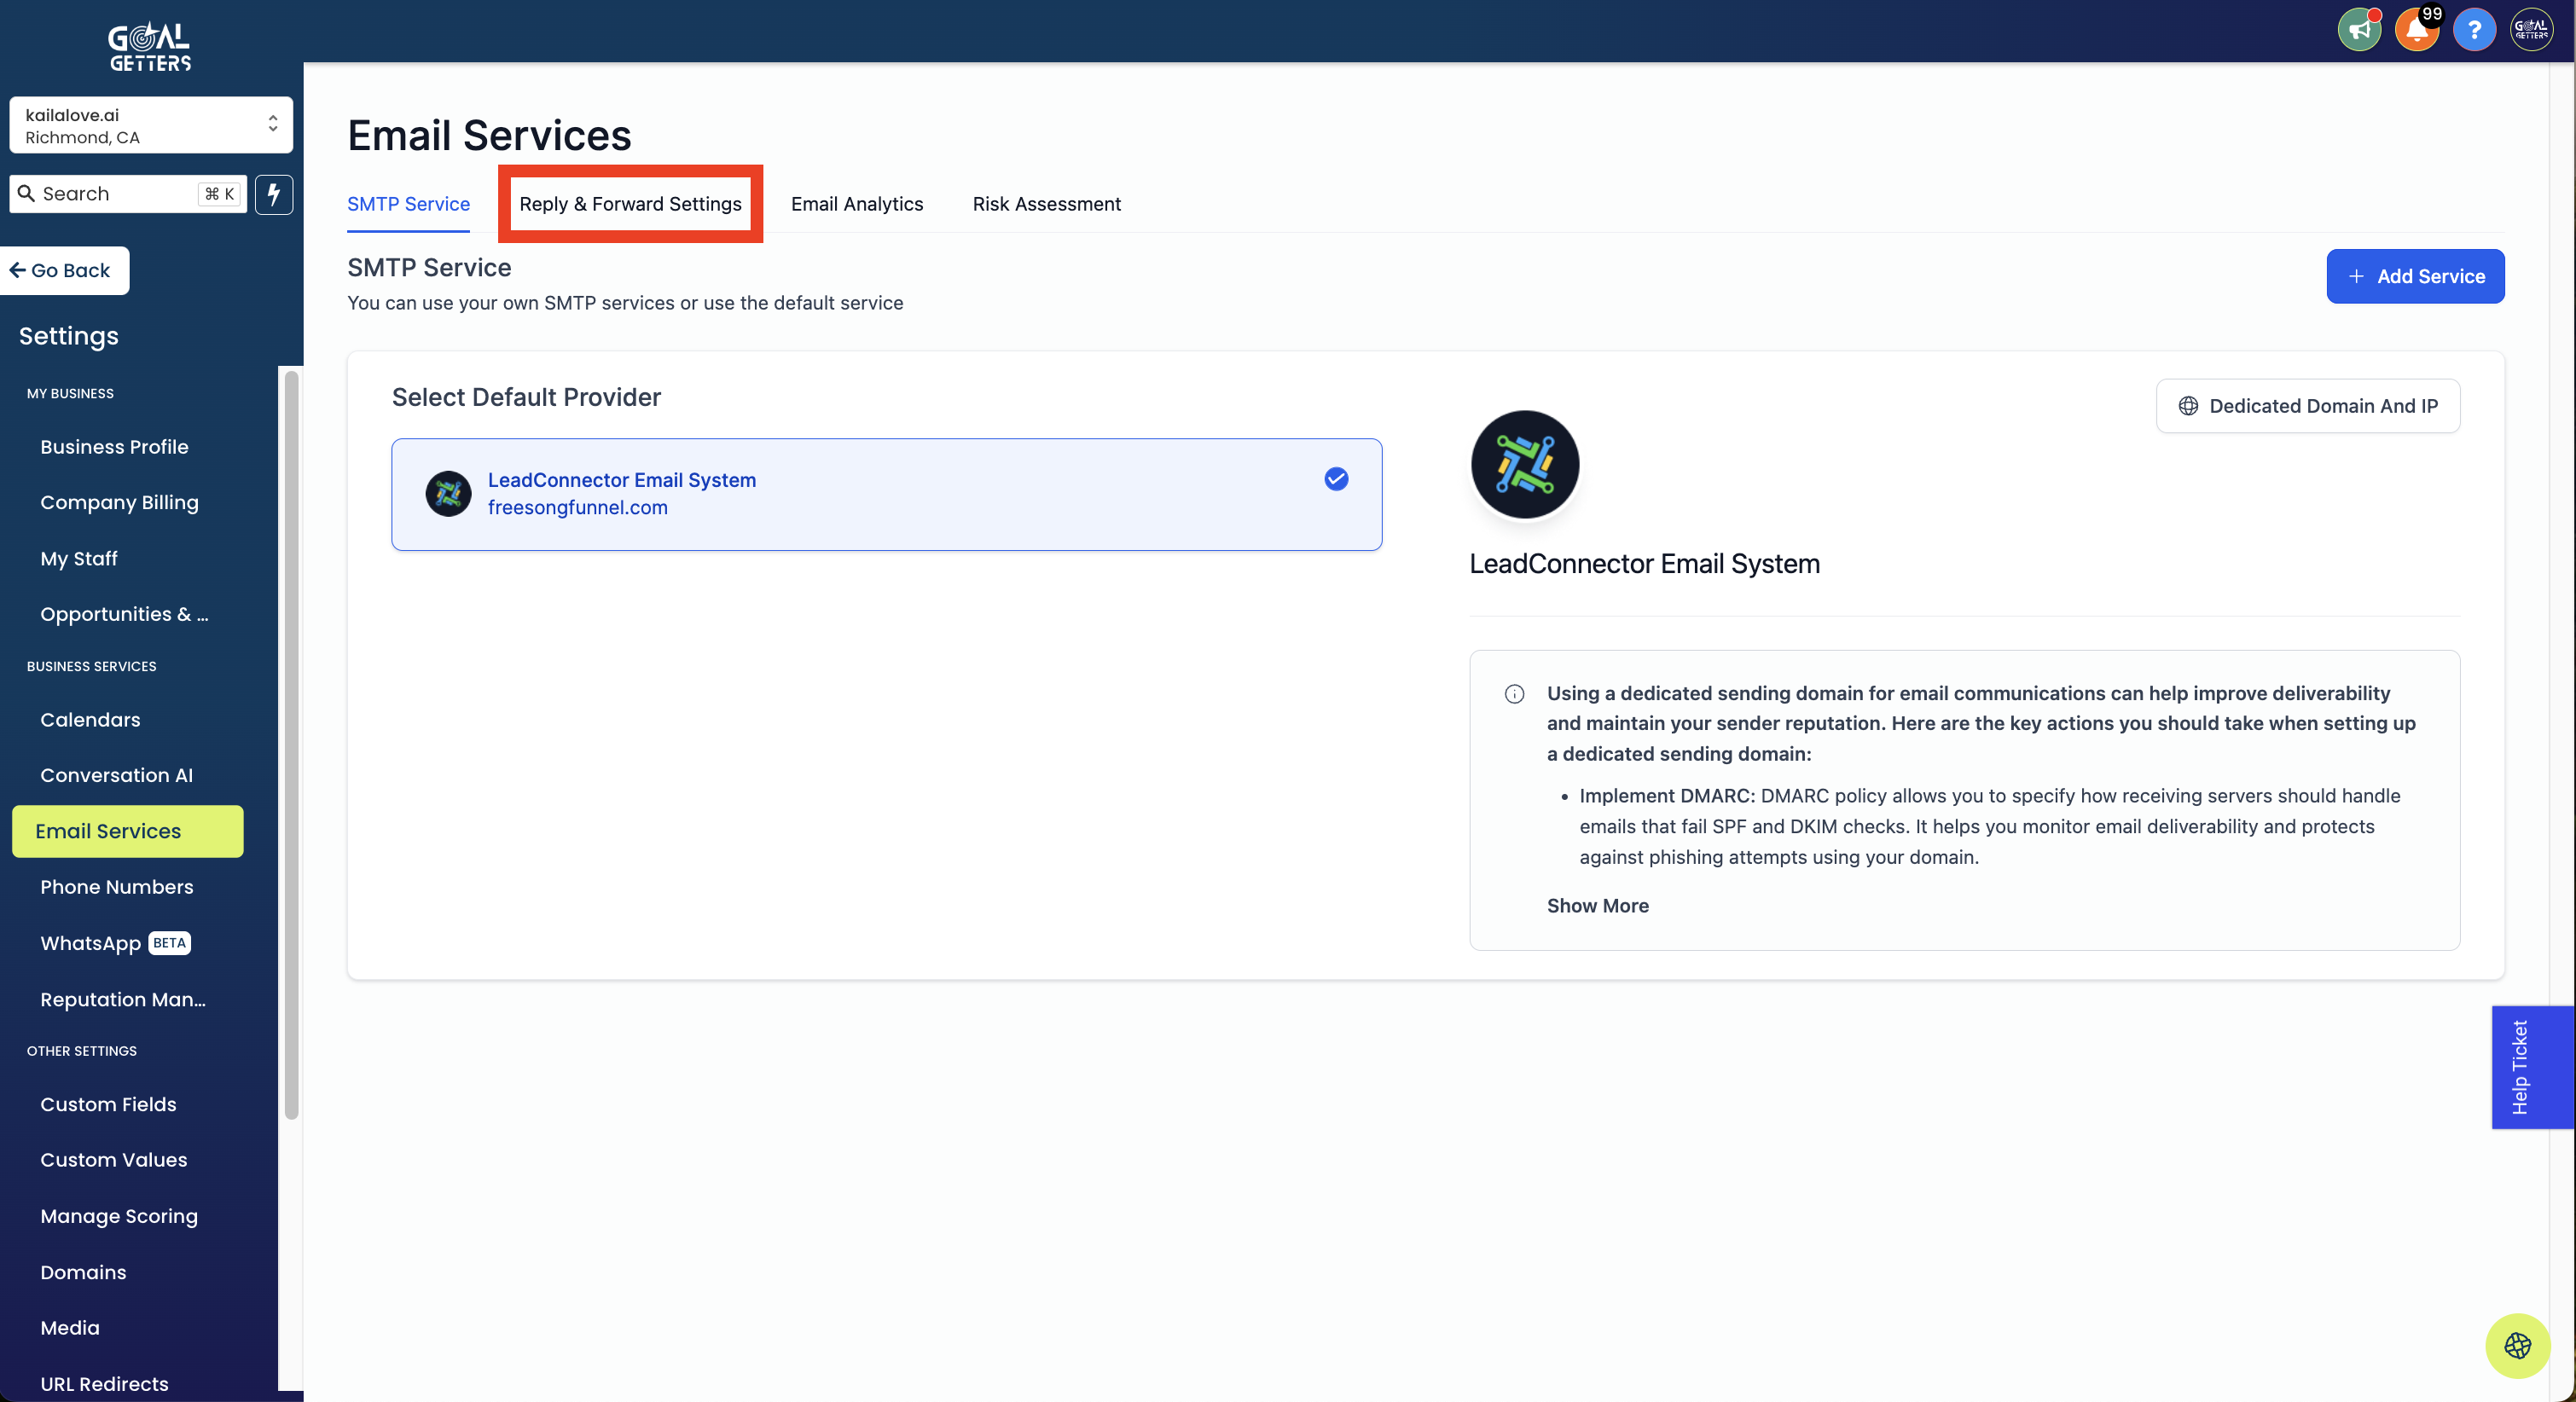
Step 1: From your GoalGetters Dashboard, go to Email > Email Settings
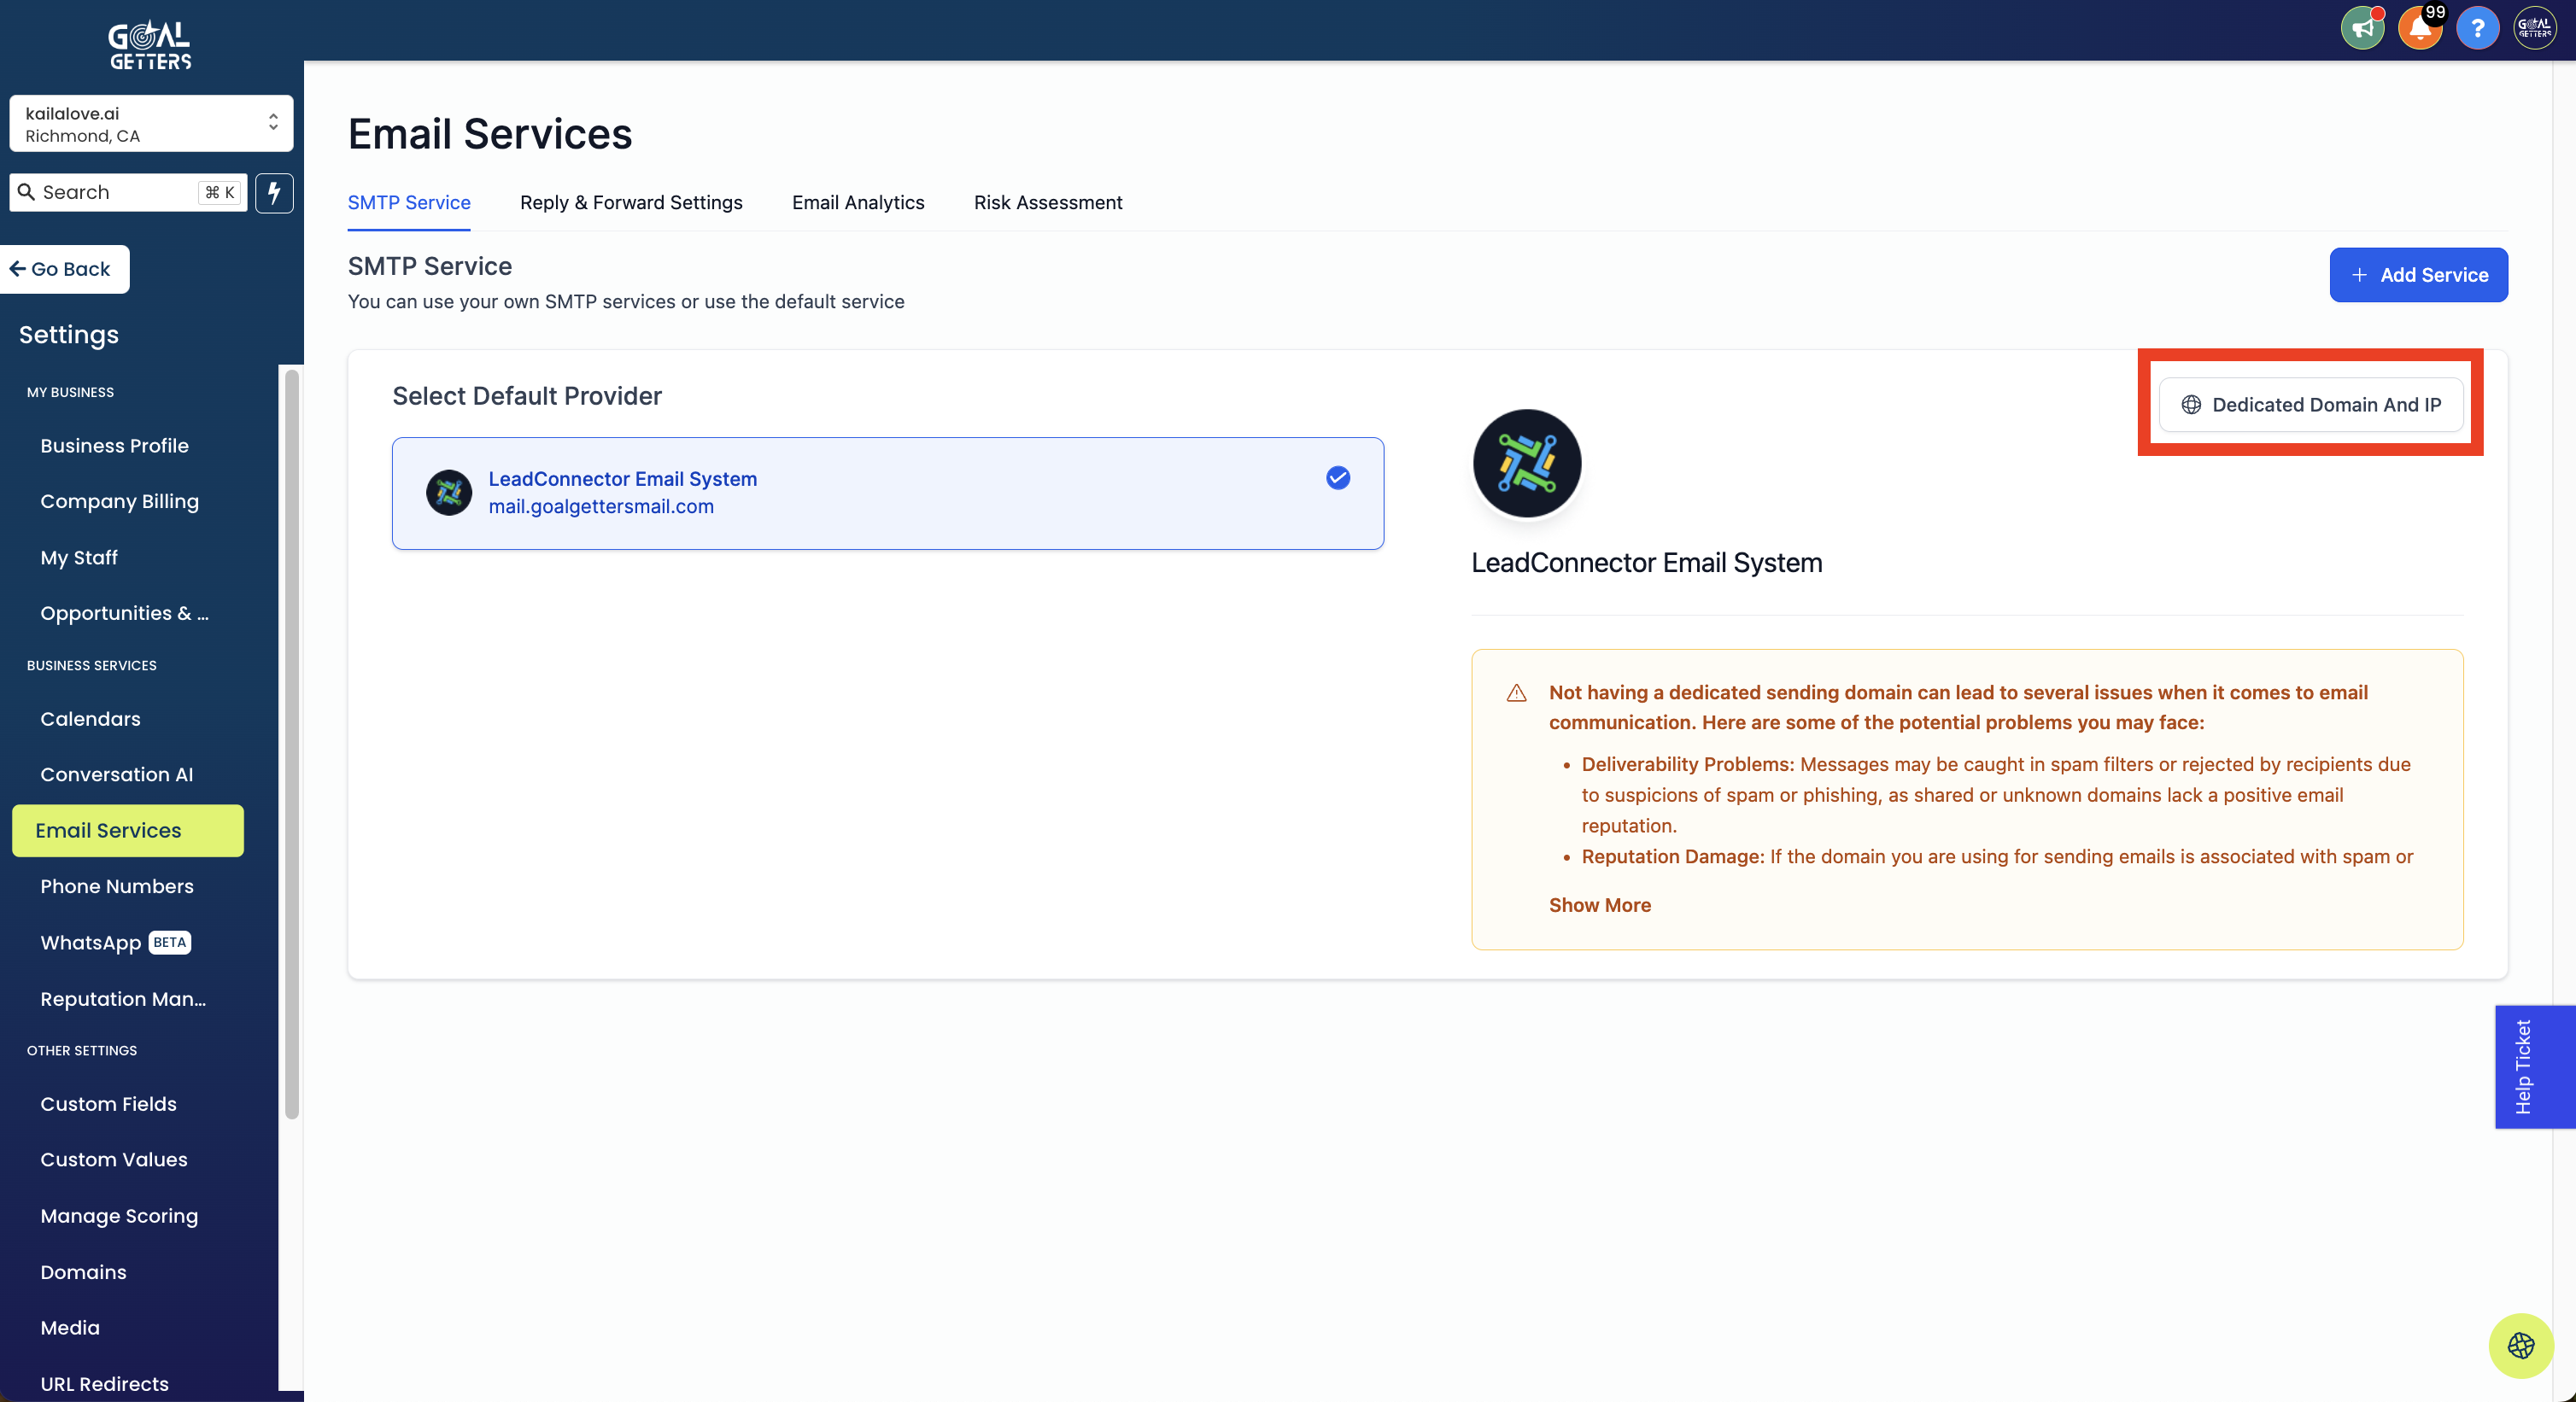
Step 2: Click the white button that says "Dedicated Domain And IP" (see red box in below screenshot)
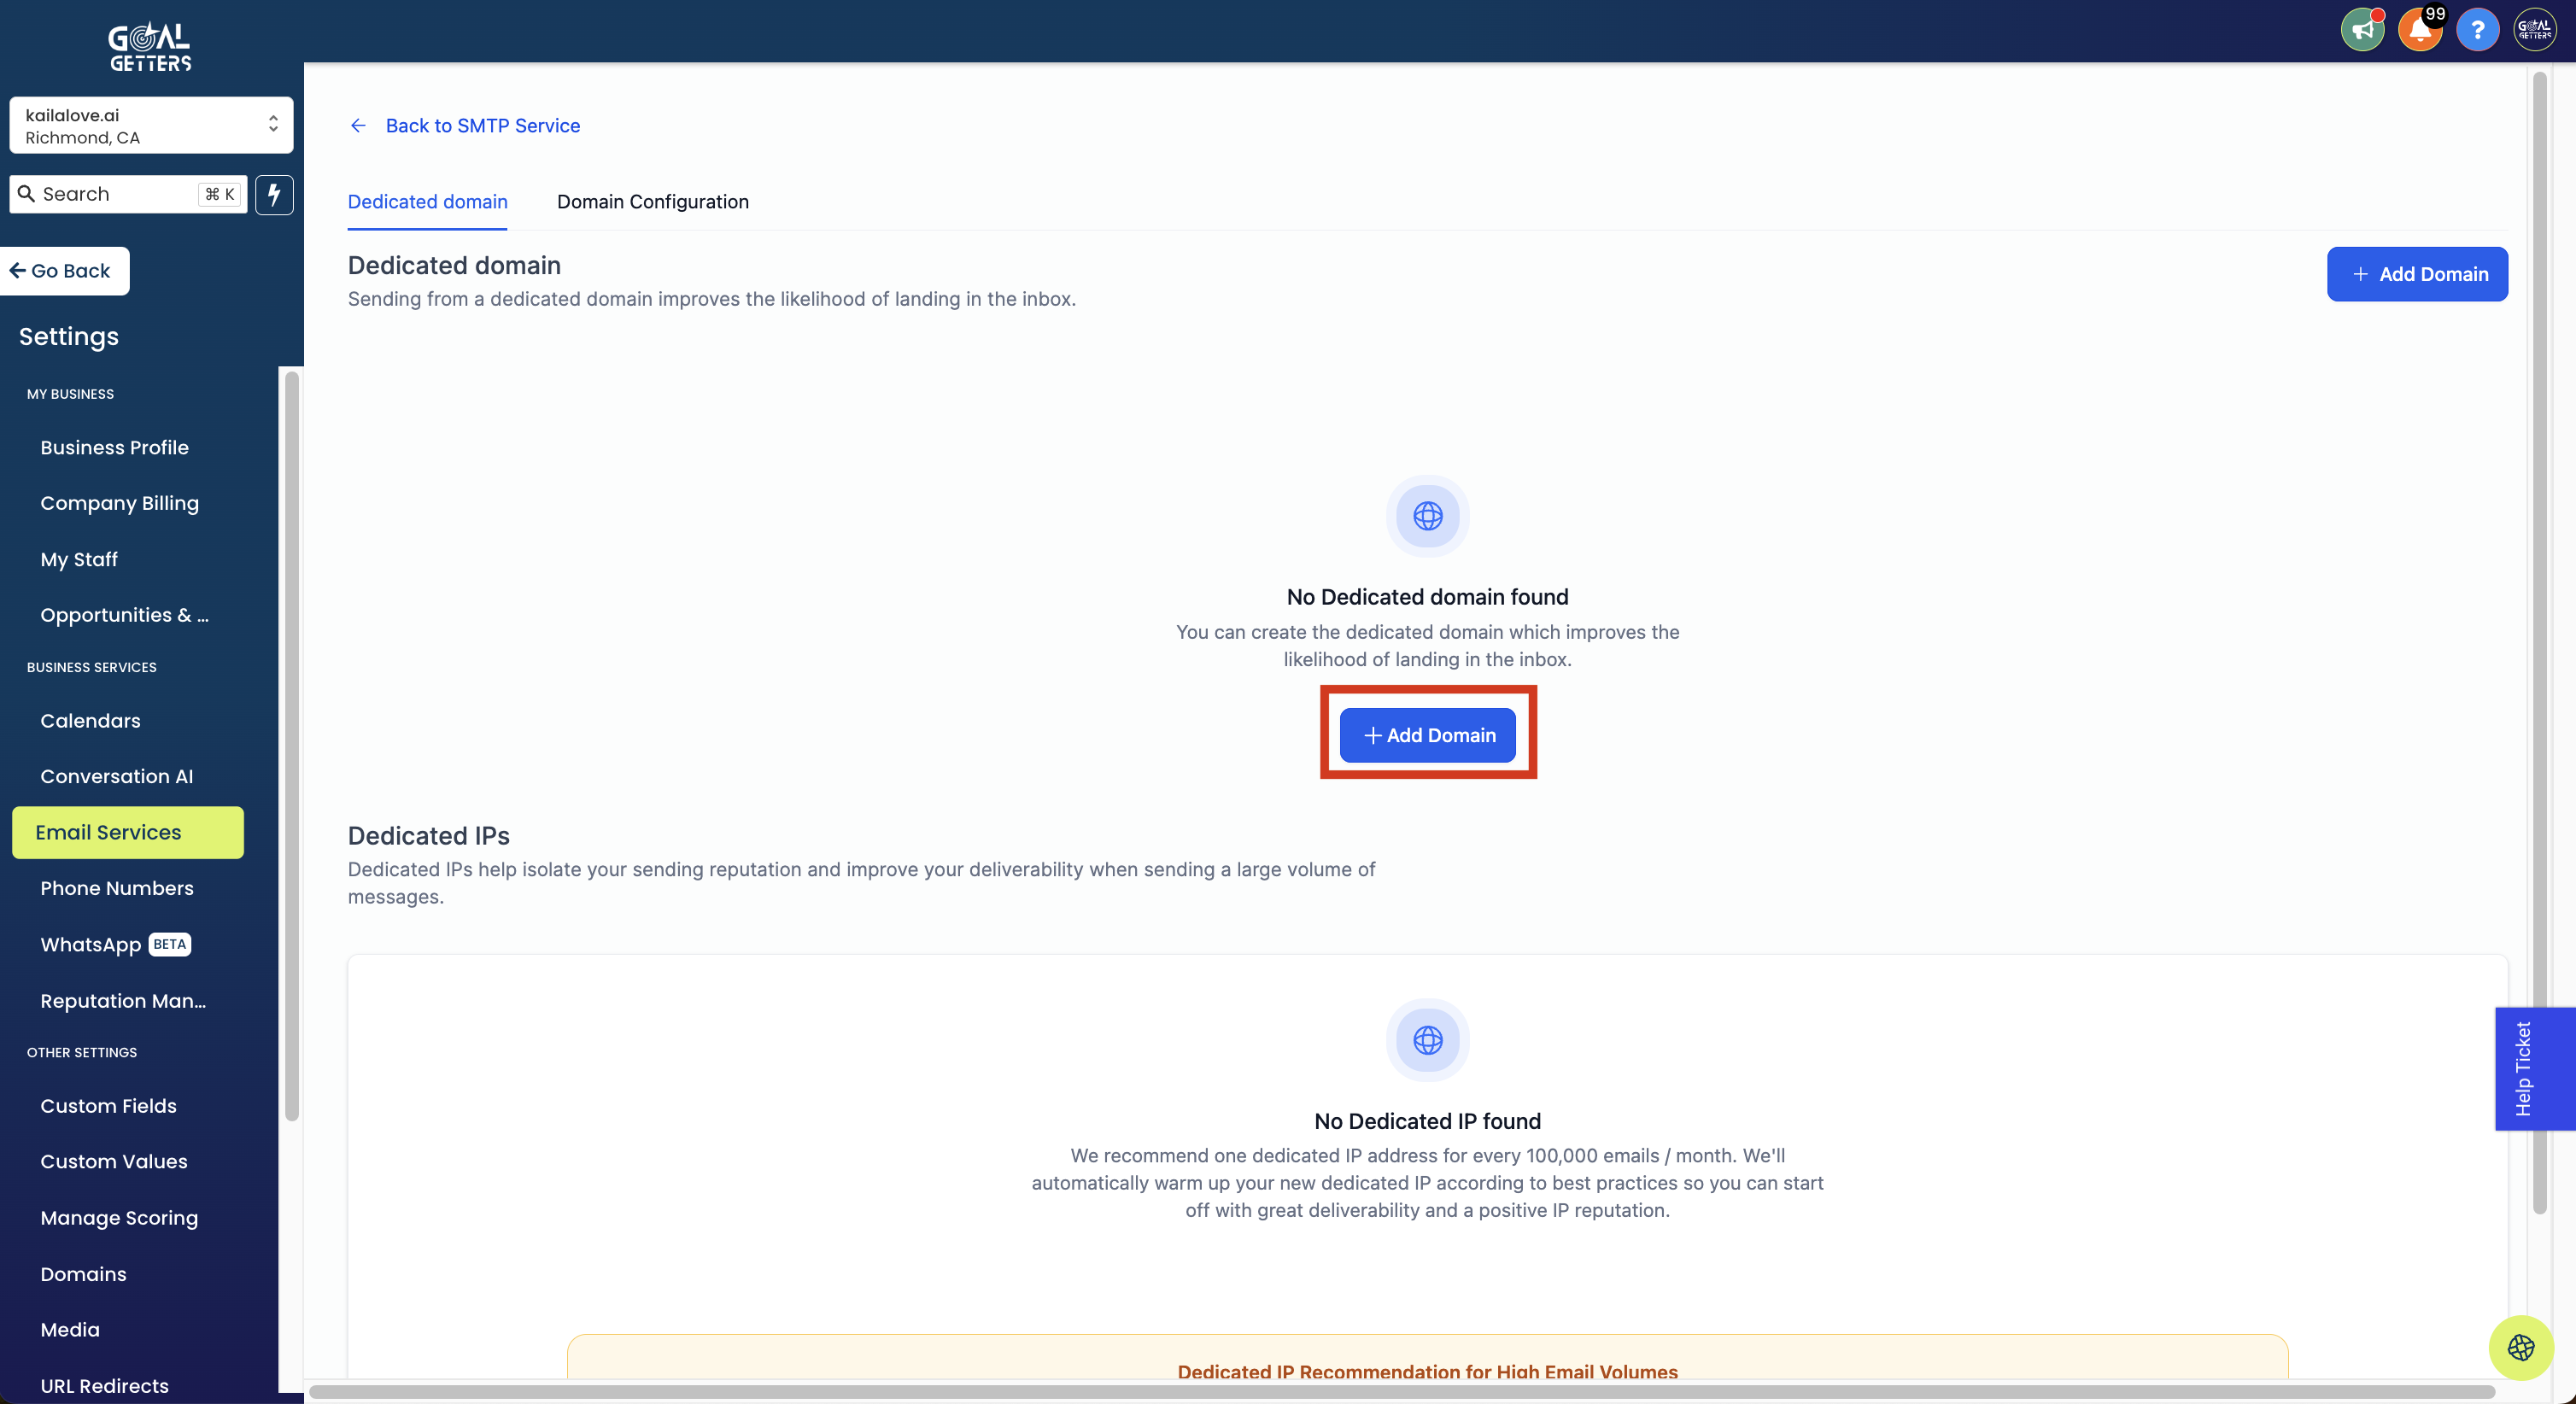
Step 3: Click the Blue Button that Says "+ Add Domain"
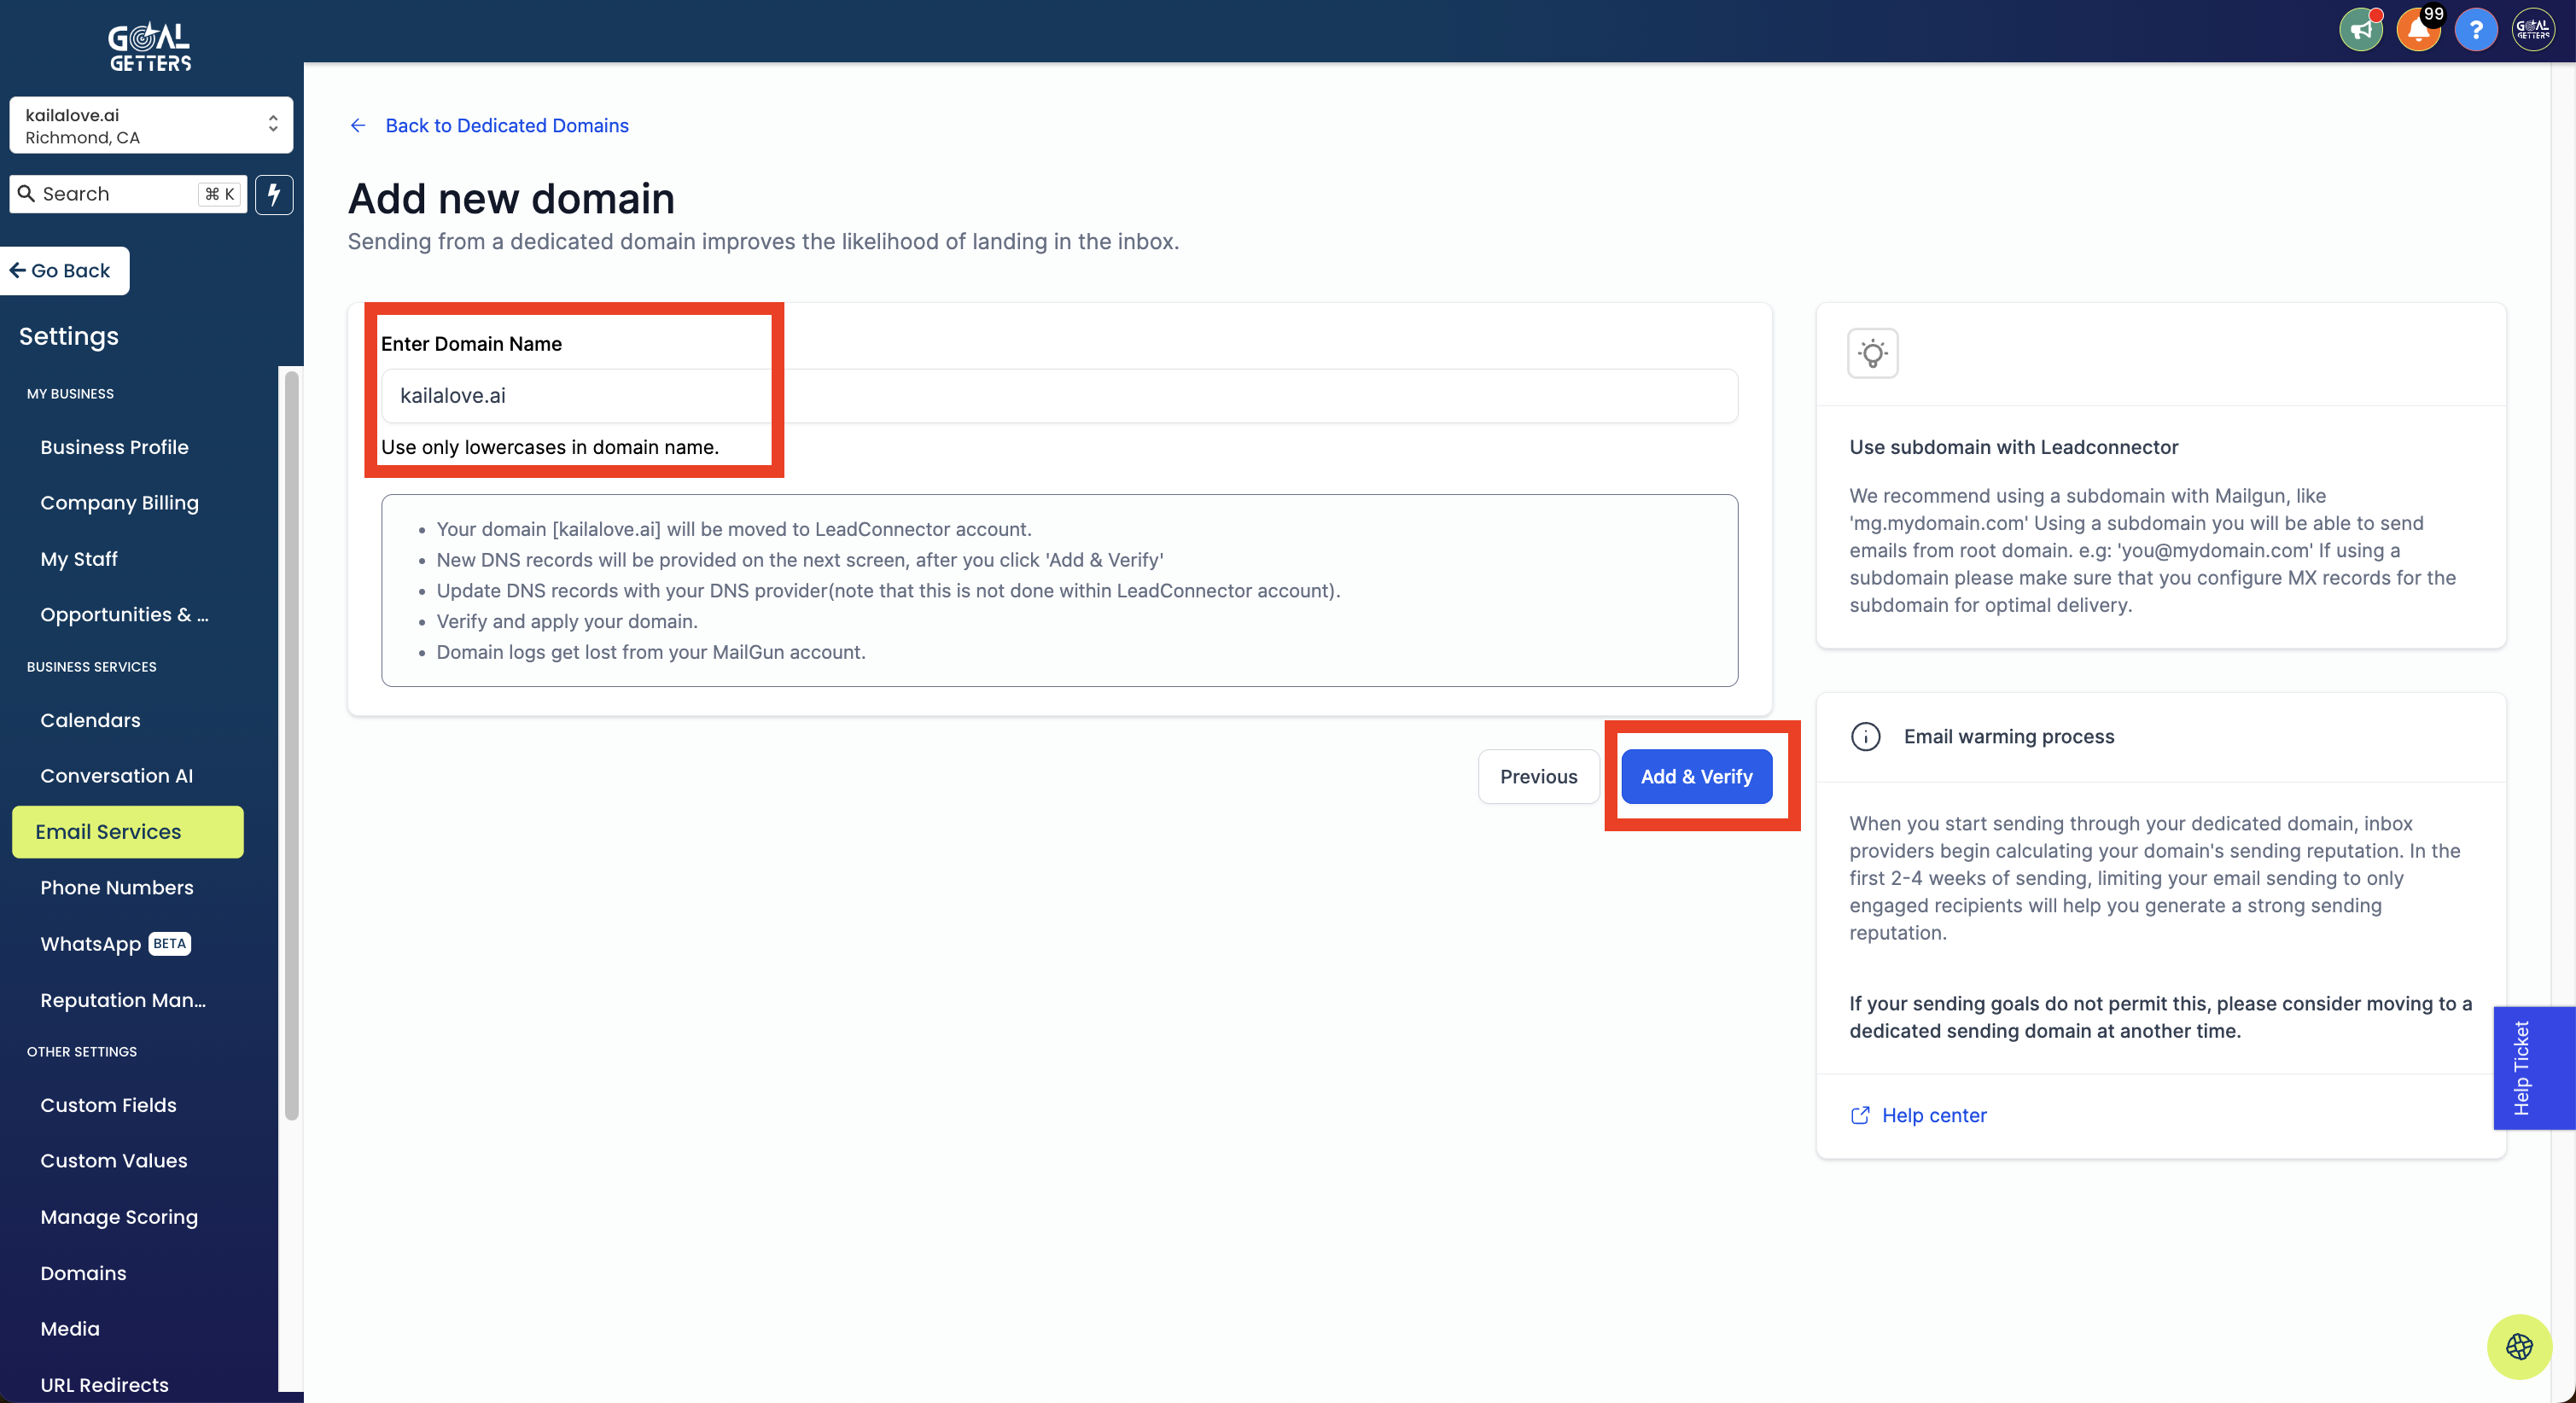
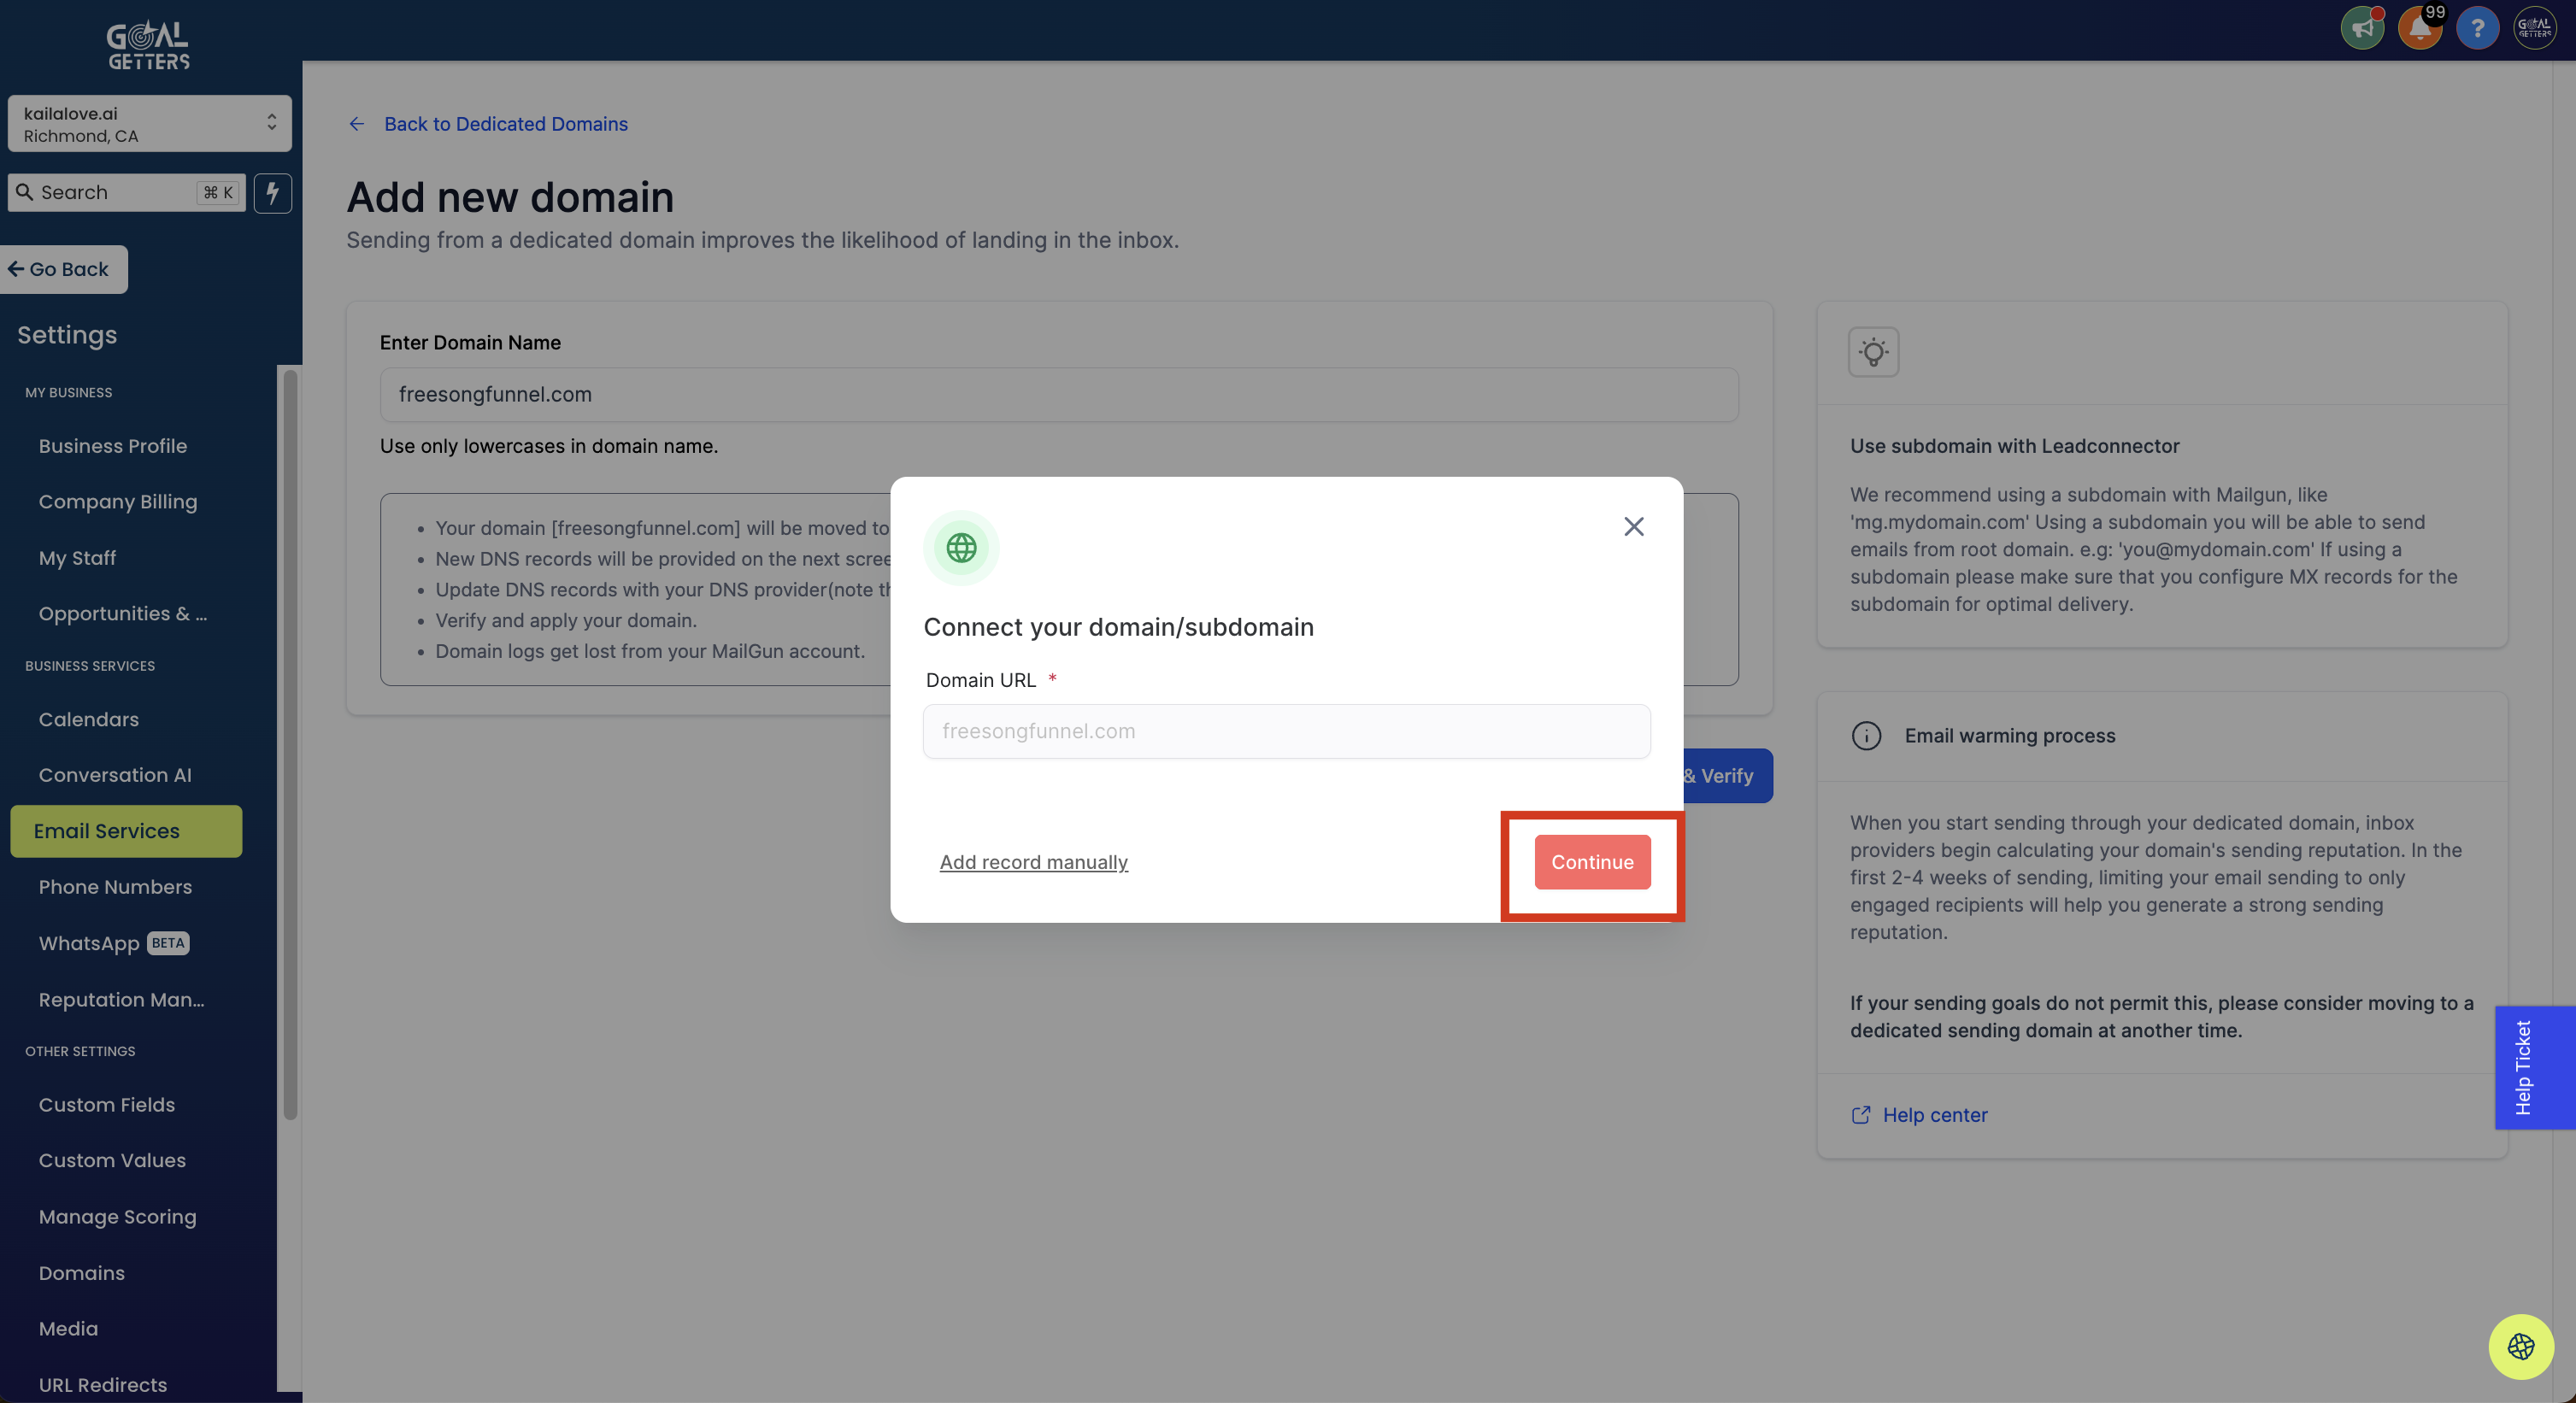
Step 4: Enter your domain name. Then click "Add & Verify"
Step 5: If your domain has never been set up for email sending, then you will see this box appear. Click "Continue"
Note: If you have used your domain for email sending in the past, such as getting an email with a domain service provide or My Google Workspace, you will see this popup notifying you:
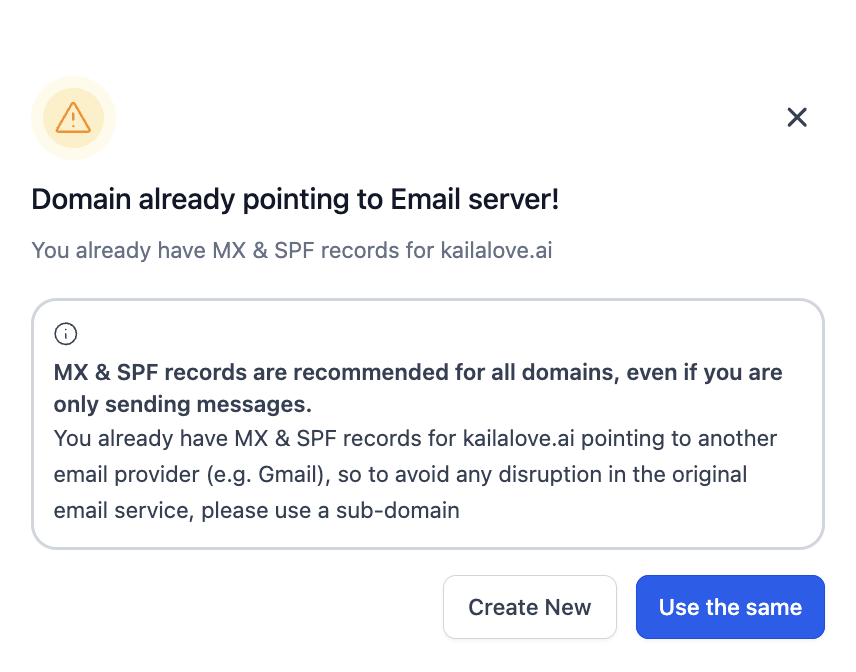
If you are actively using your domain to send emails, then DO NOT add records here as it will override your current set up. Instead, you will want to add a subdomain. It is the same process, you would just go back and add something before your main domain such as "mail.freesongfunnel.com" (vs freesongfunnel.com)
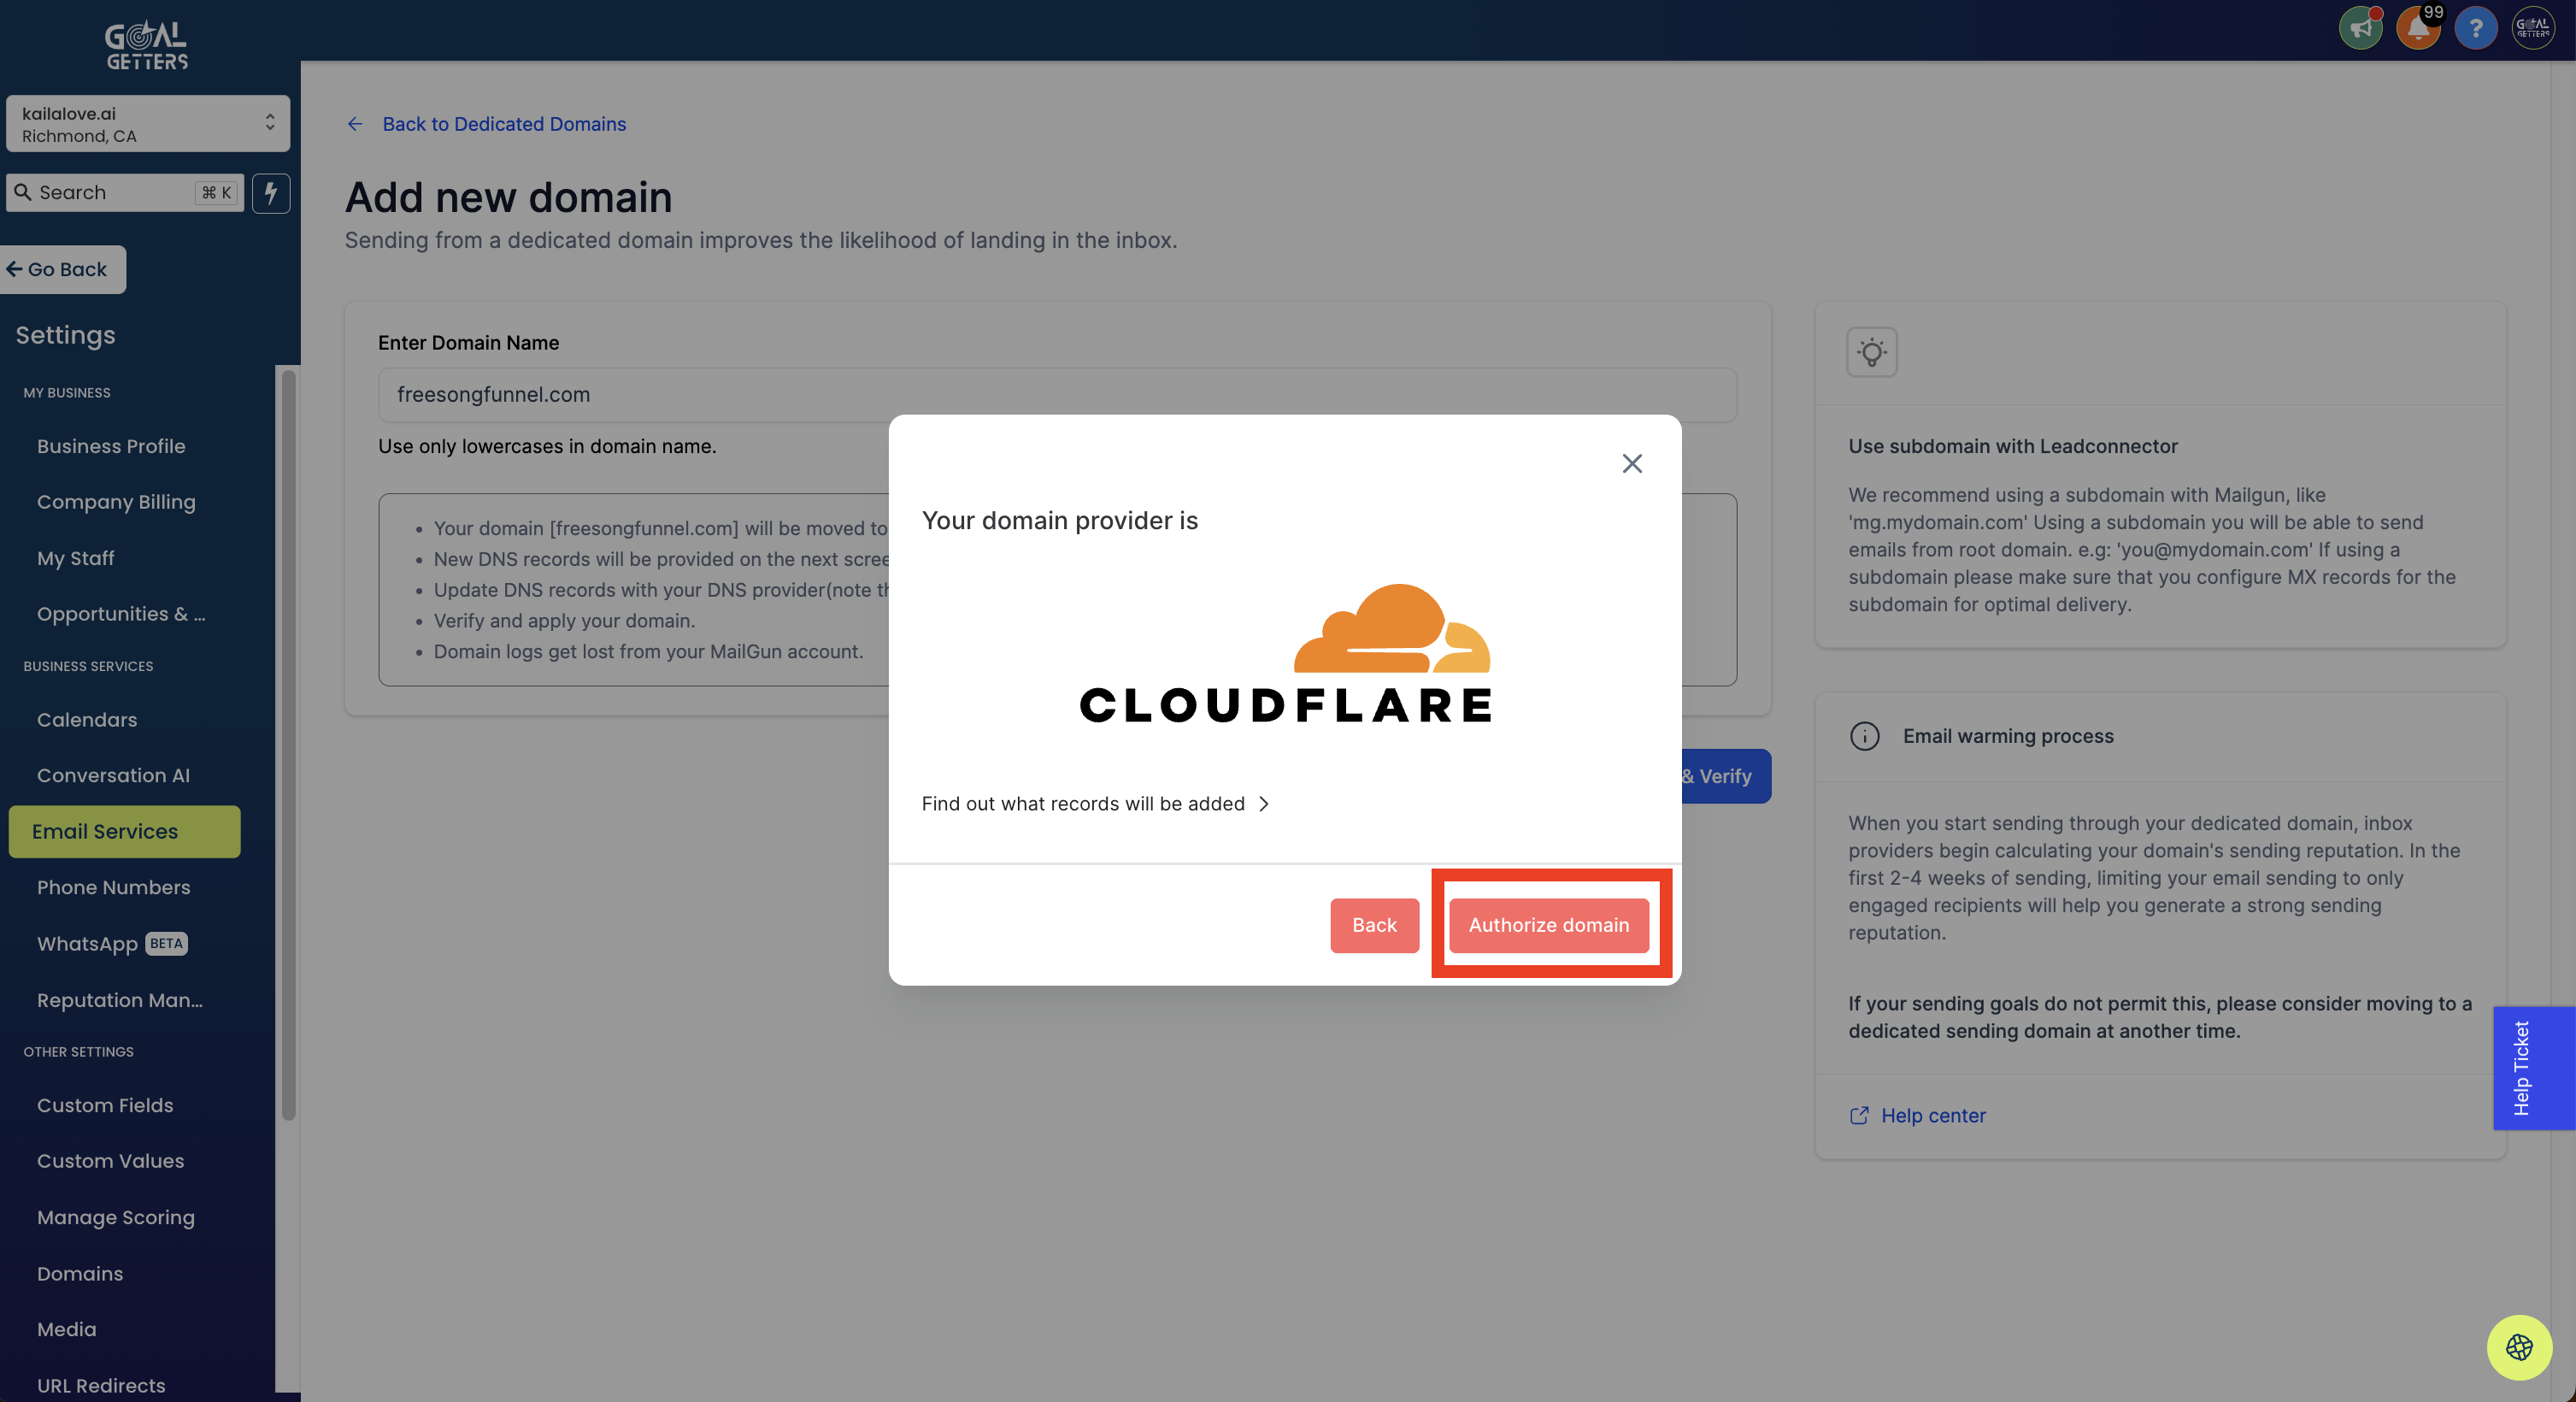
Step 6: Depending on if you have a domain provider that is integrated with GoalGetters (such as Cloudflare, GoDaddy, or Google Domains), you will see a window like this popup. Click "Authorize Domain" to automatically add most of the records you will need to verify your dedicated sending domain.
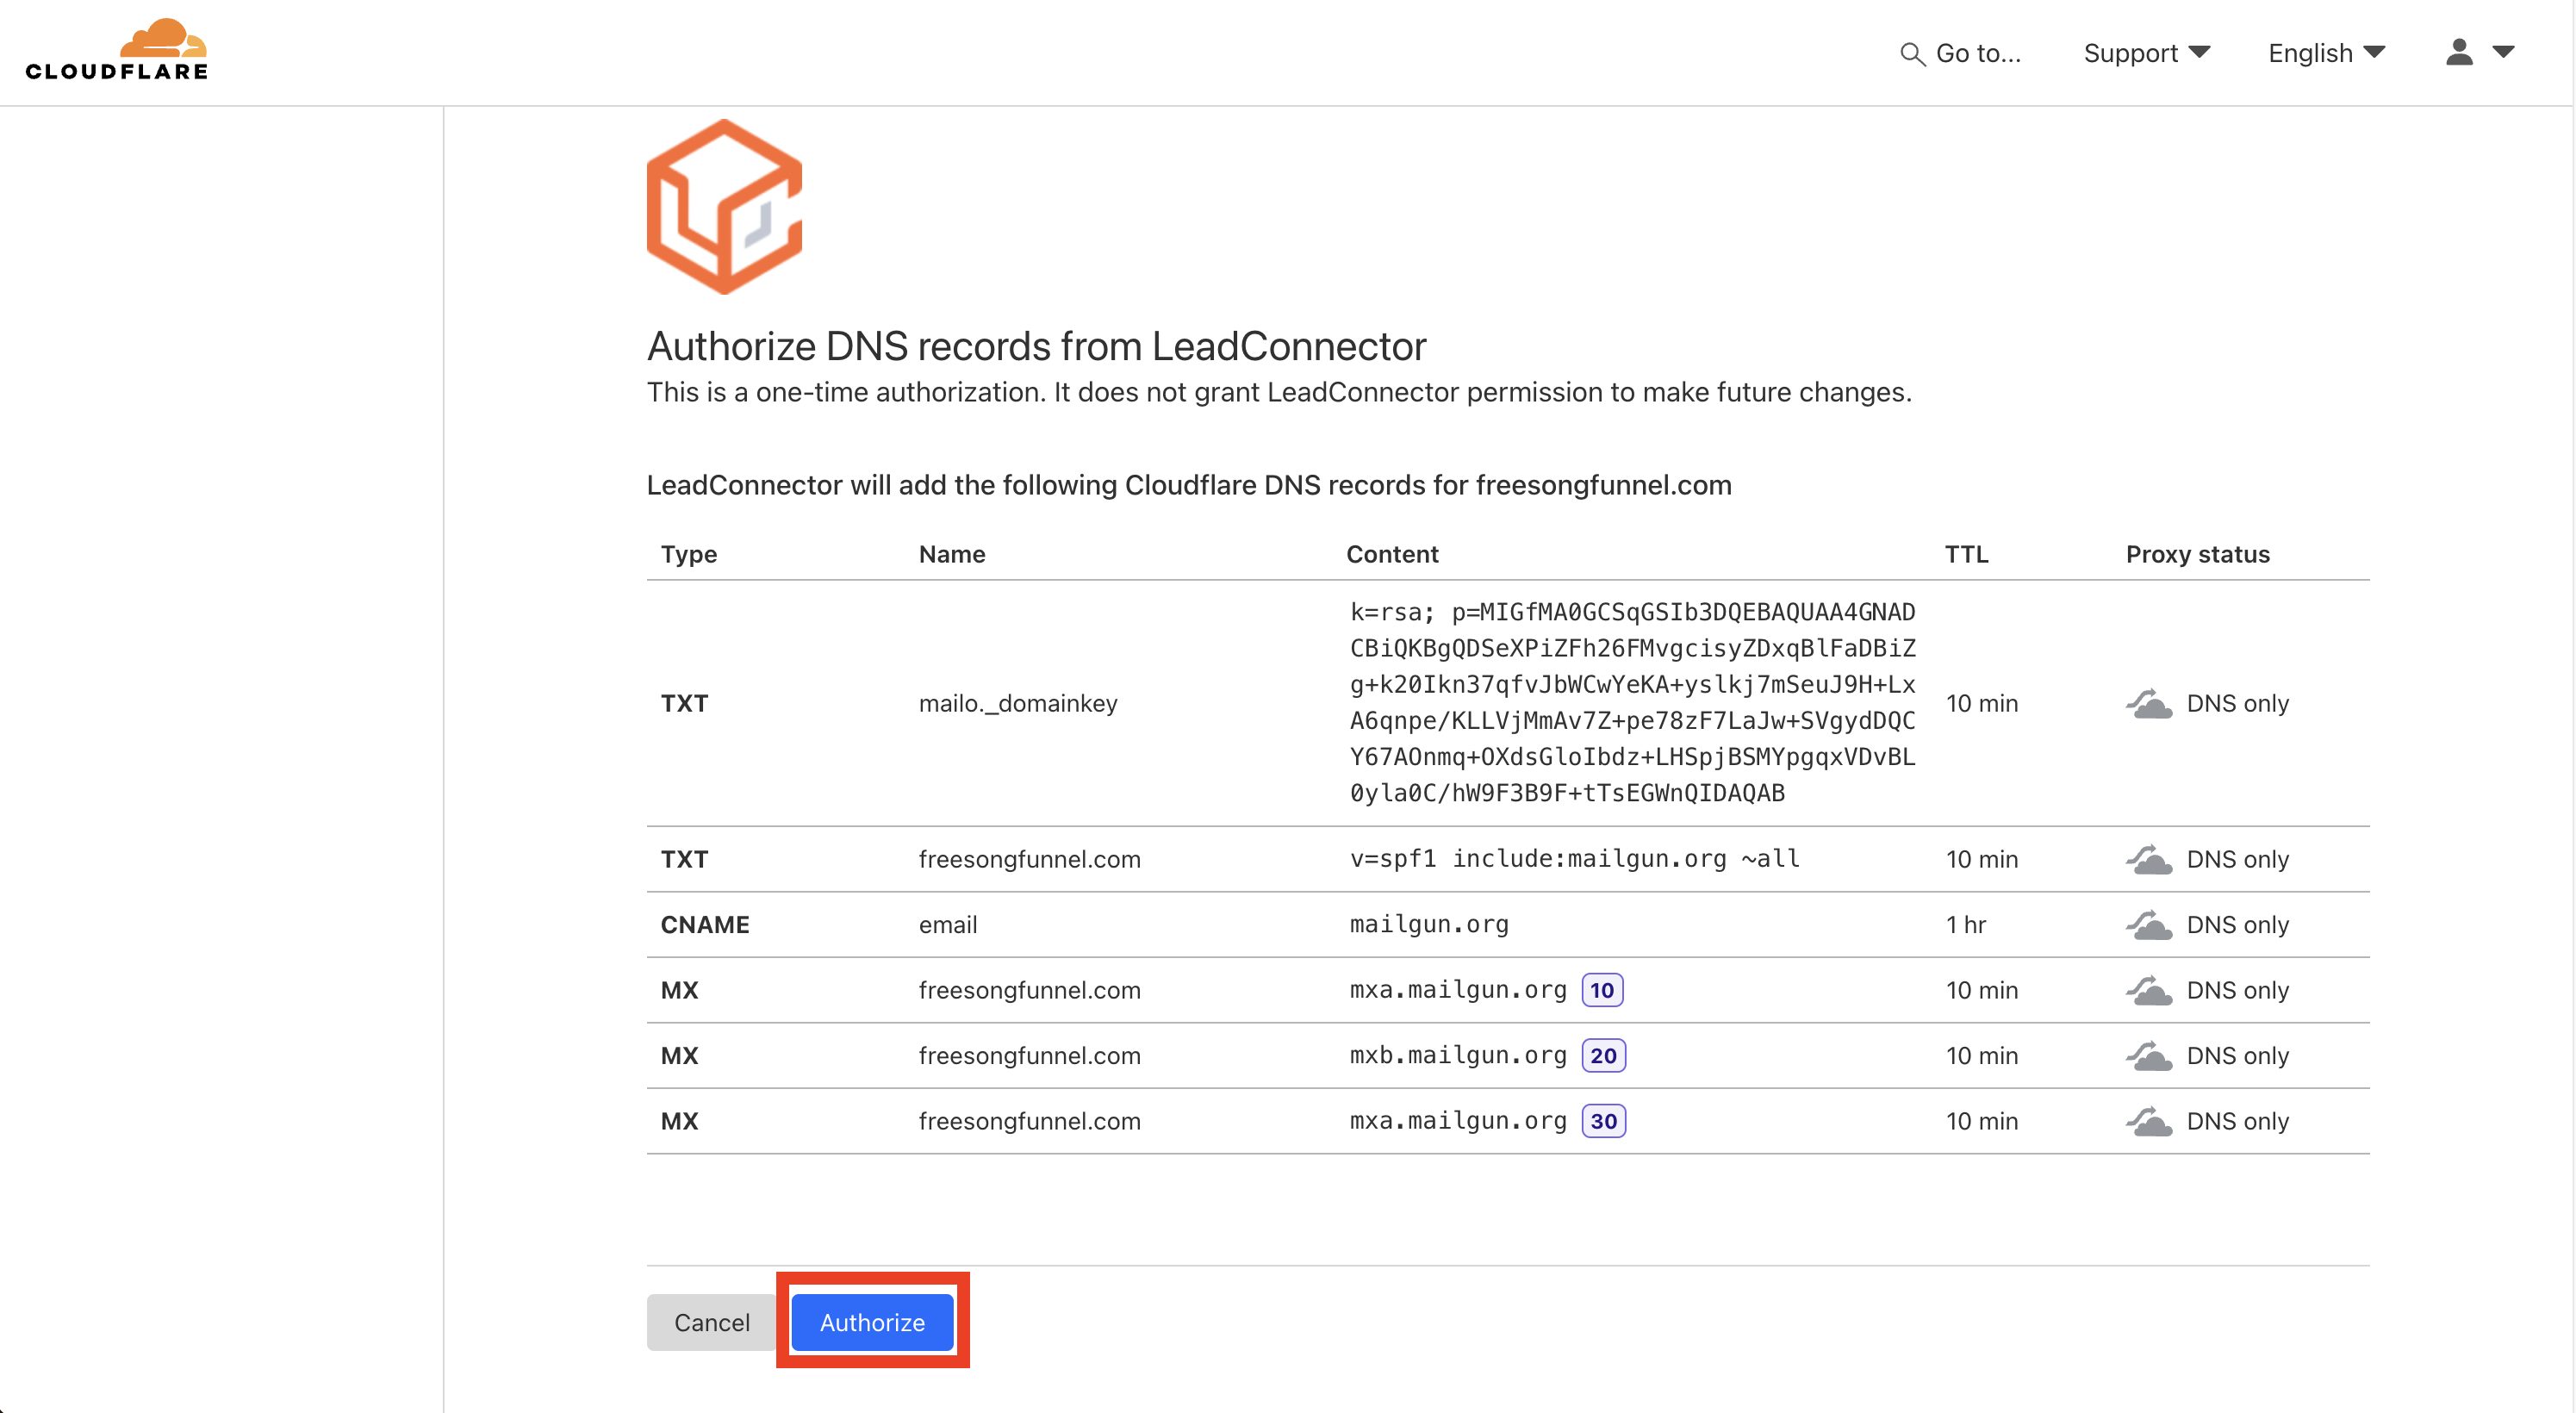
Step 7: You will be taken to your domain provider's website and see something that looks like this. Note: it will look slightly different depending on who your domain provider is. This is what it looks like for Cloudflare. Click "Authorize"
Step 8: Once you've authorized the records to be added to your domain, you'll be directed back to GoalGetters where you'll see the status of each of your records. Click "Verify Domain"
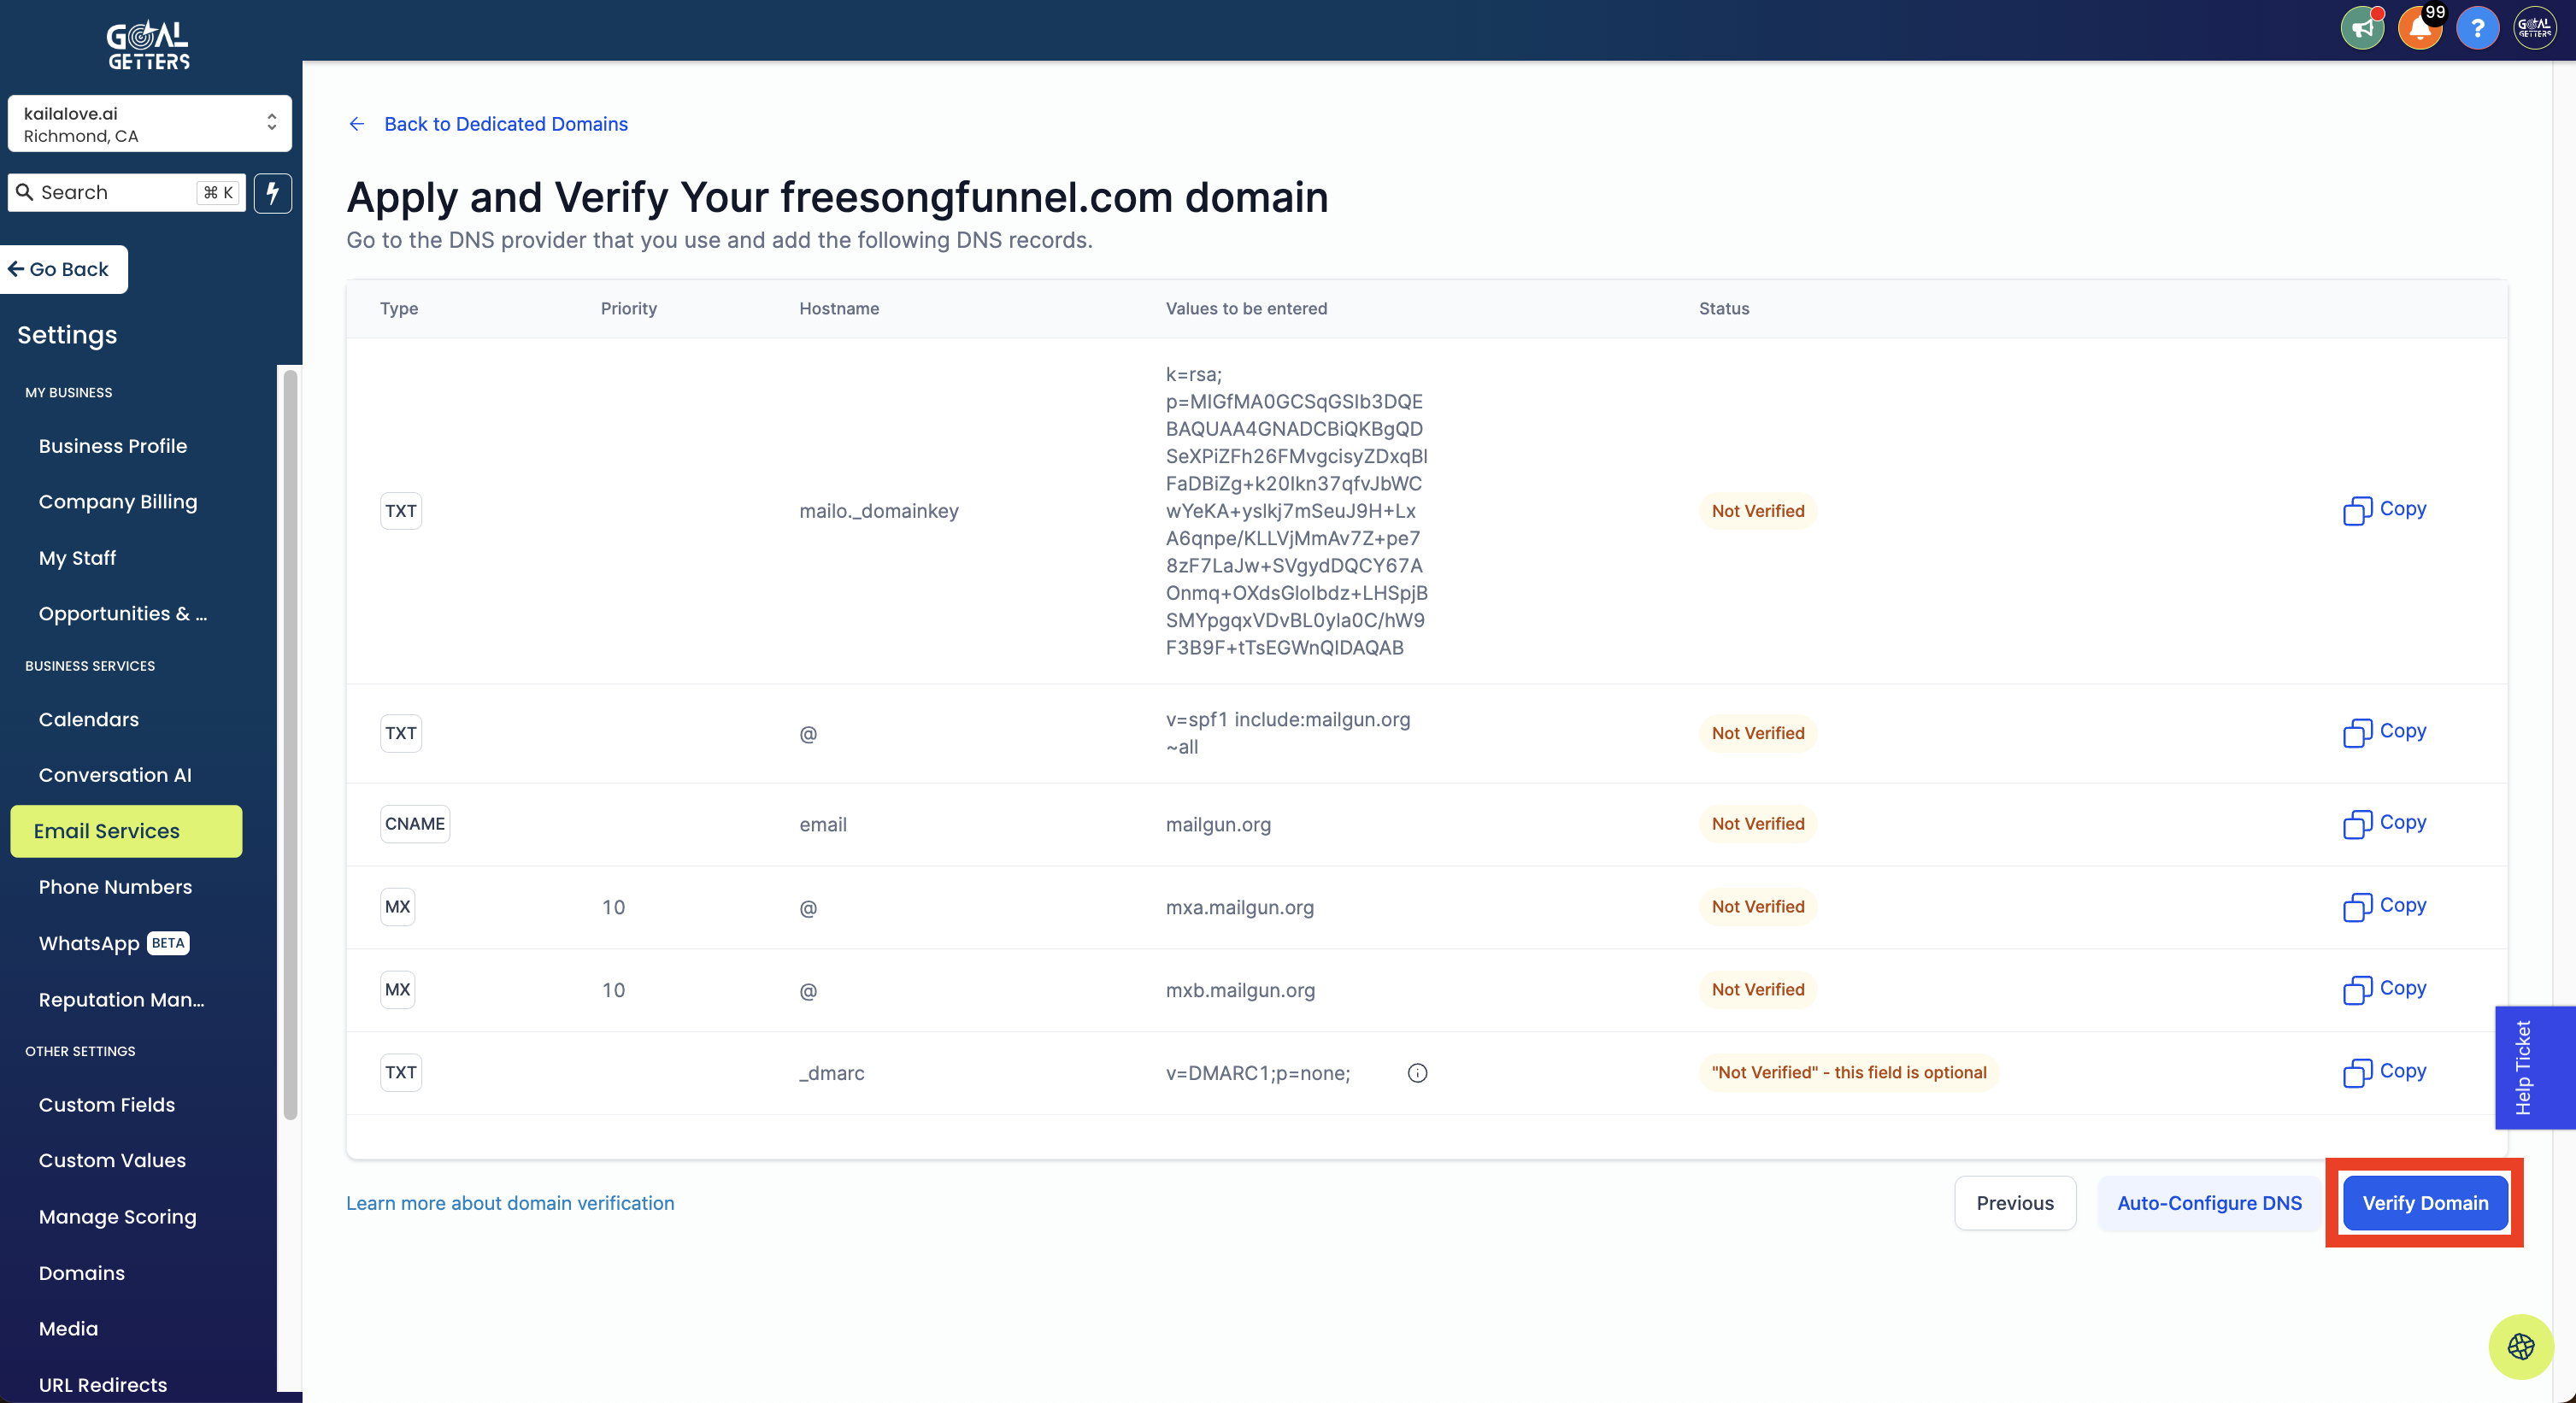
Step 8: It may take a few tries, but eventually you will see that the status of the first five records will appear as "Verified." Note, the last record, the DMARC record, will not automatically be added. You will need to go into your DNS records to add this manually.
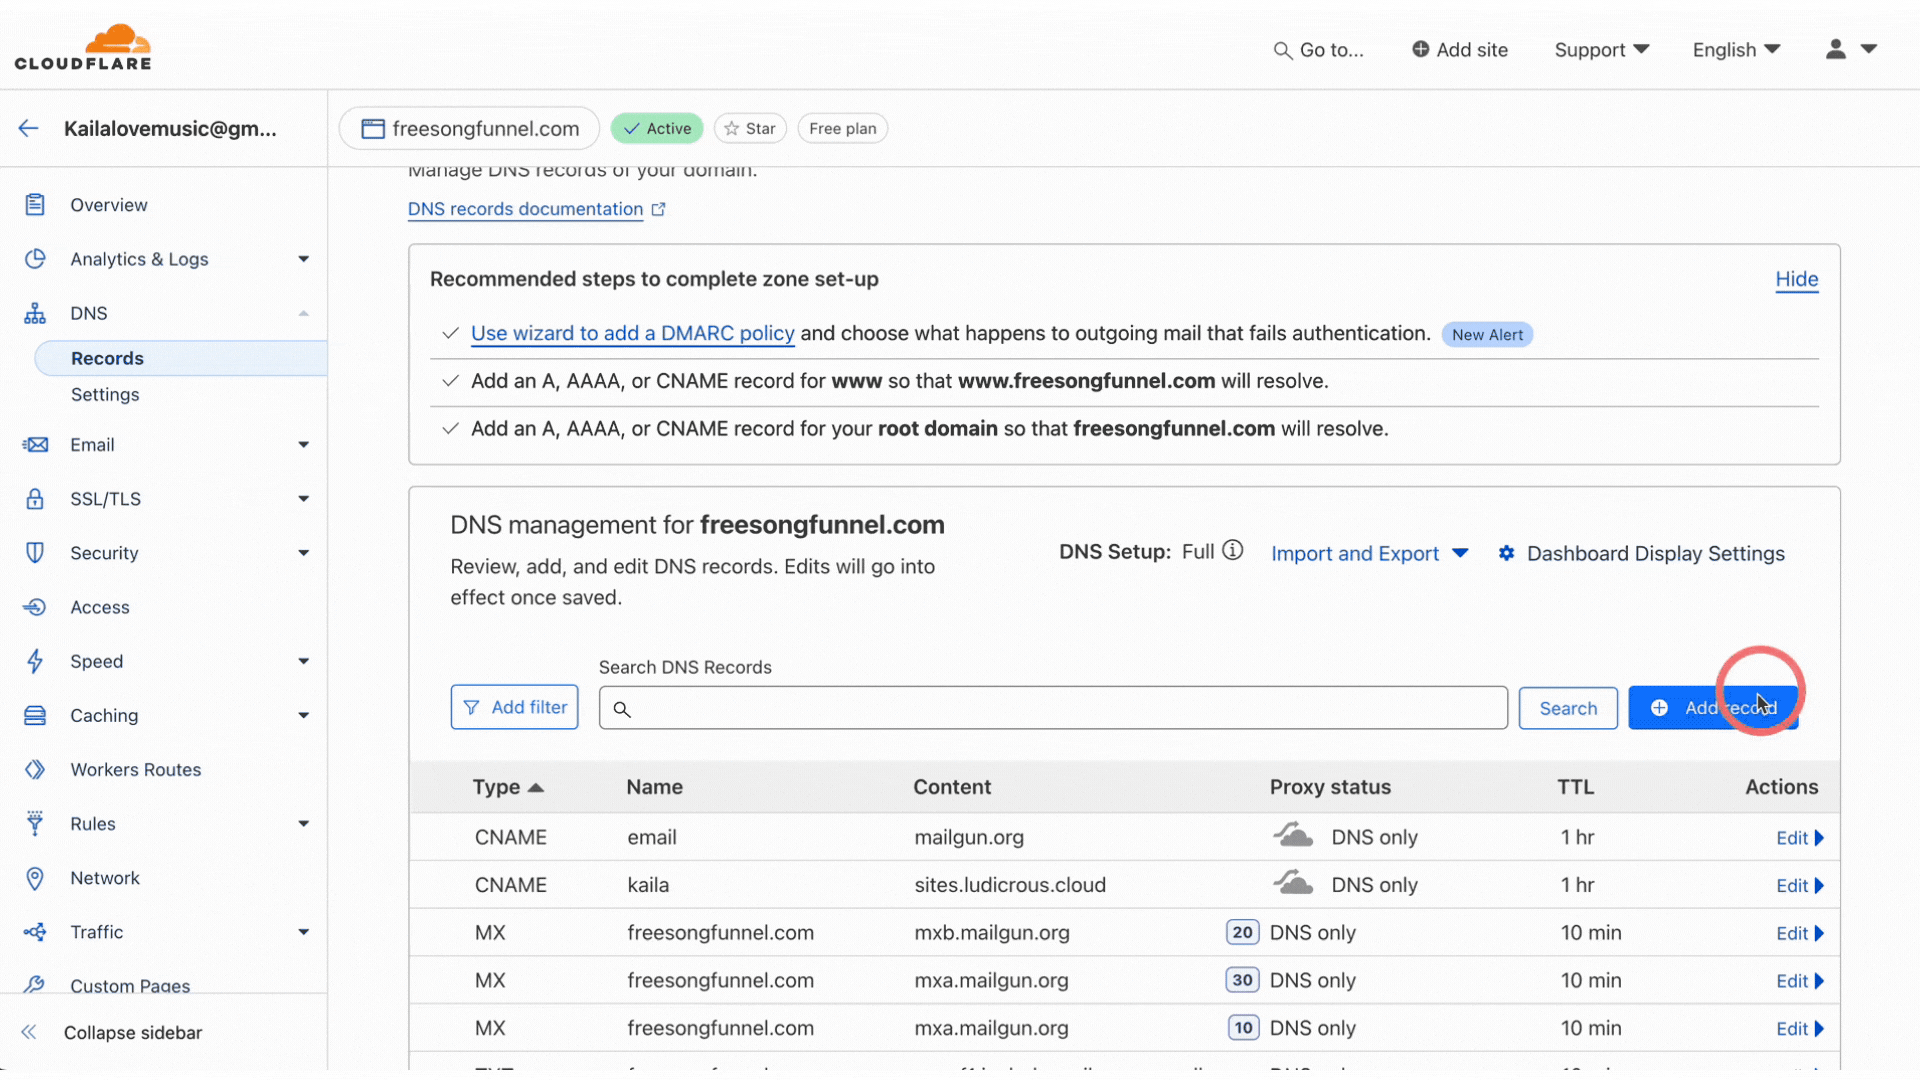
Step 9: Manually add your DMARC record - make sure to copy the name and values EXACTLY. If you aren't sure how, please see this help article for instructions for how to manually add DNS records. Note: In the example I show (using Namecheap), you will have to add your MX records in a separate area called "Mail Settings"
Here is a screen recording of me adding the DMARC record in my Cloudflare domain:
Step 10: Go back to your where your domain appears in the Email Settings of GoalGetters and Select "Verify Domain" again to ensure that all records (including DMARC) are verified now.
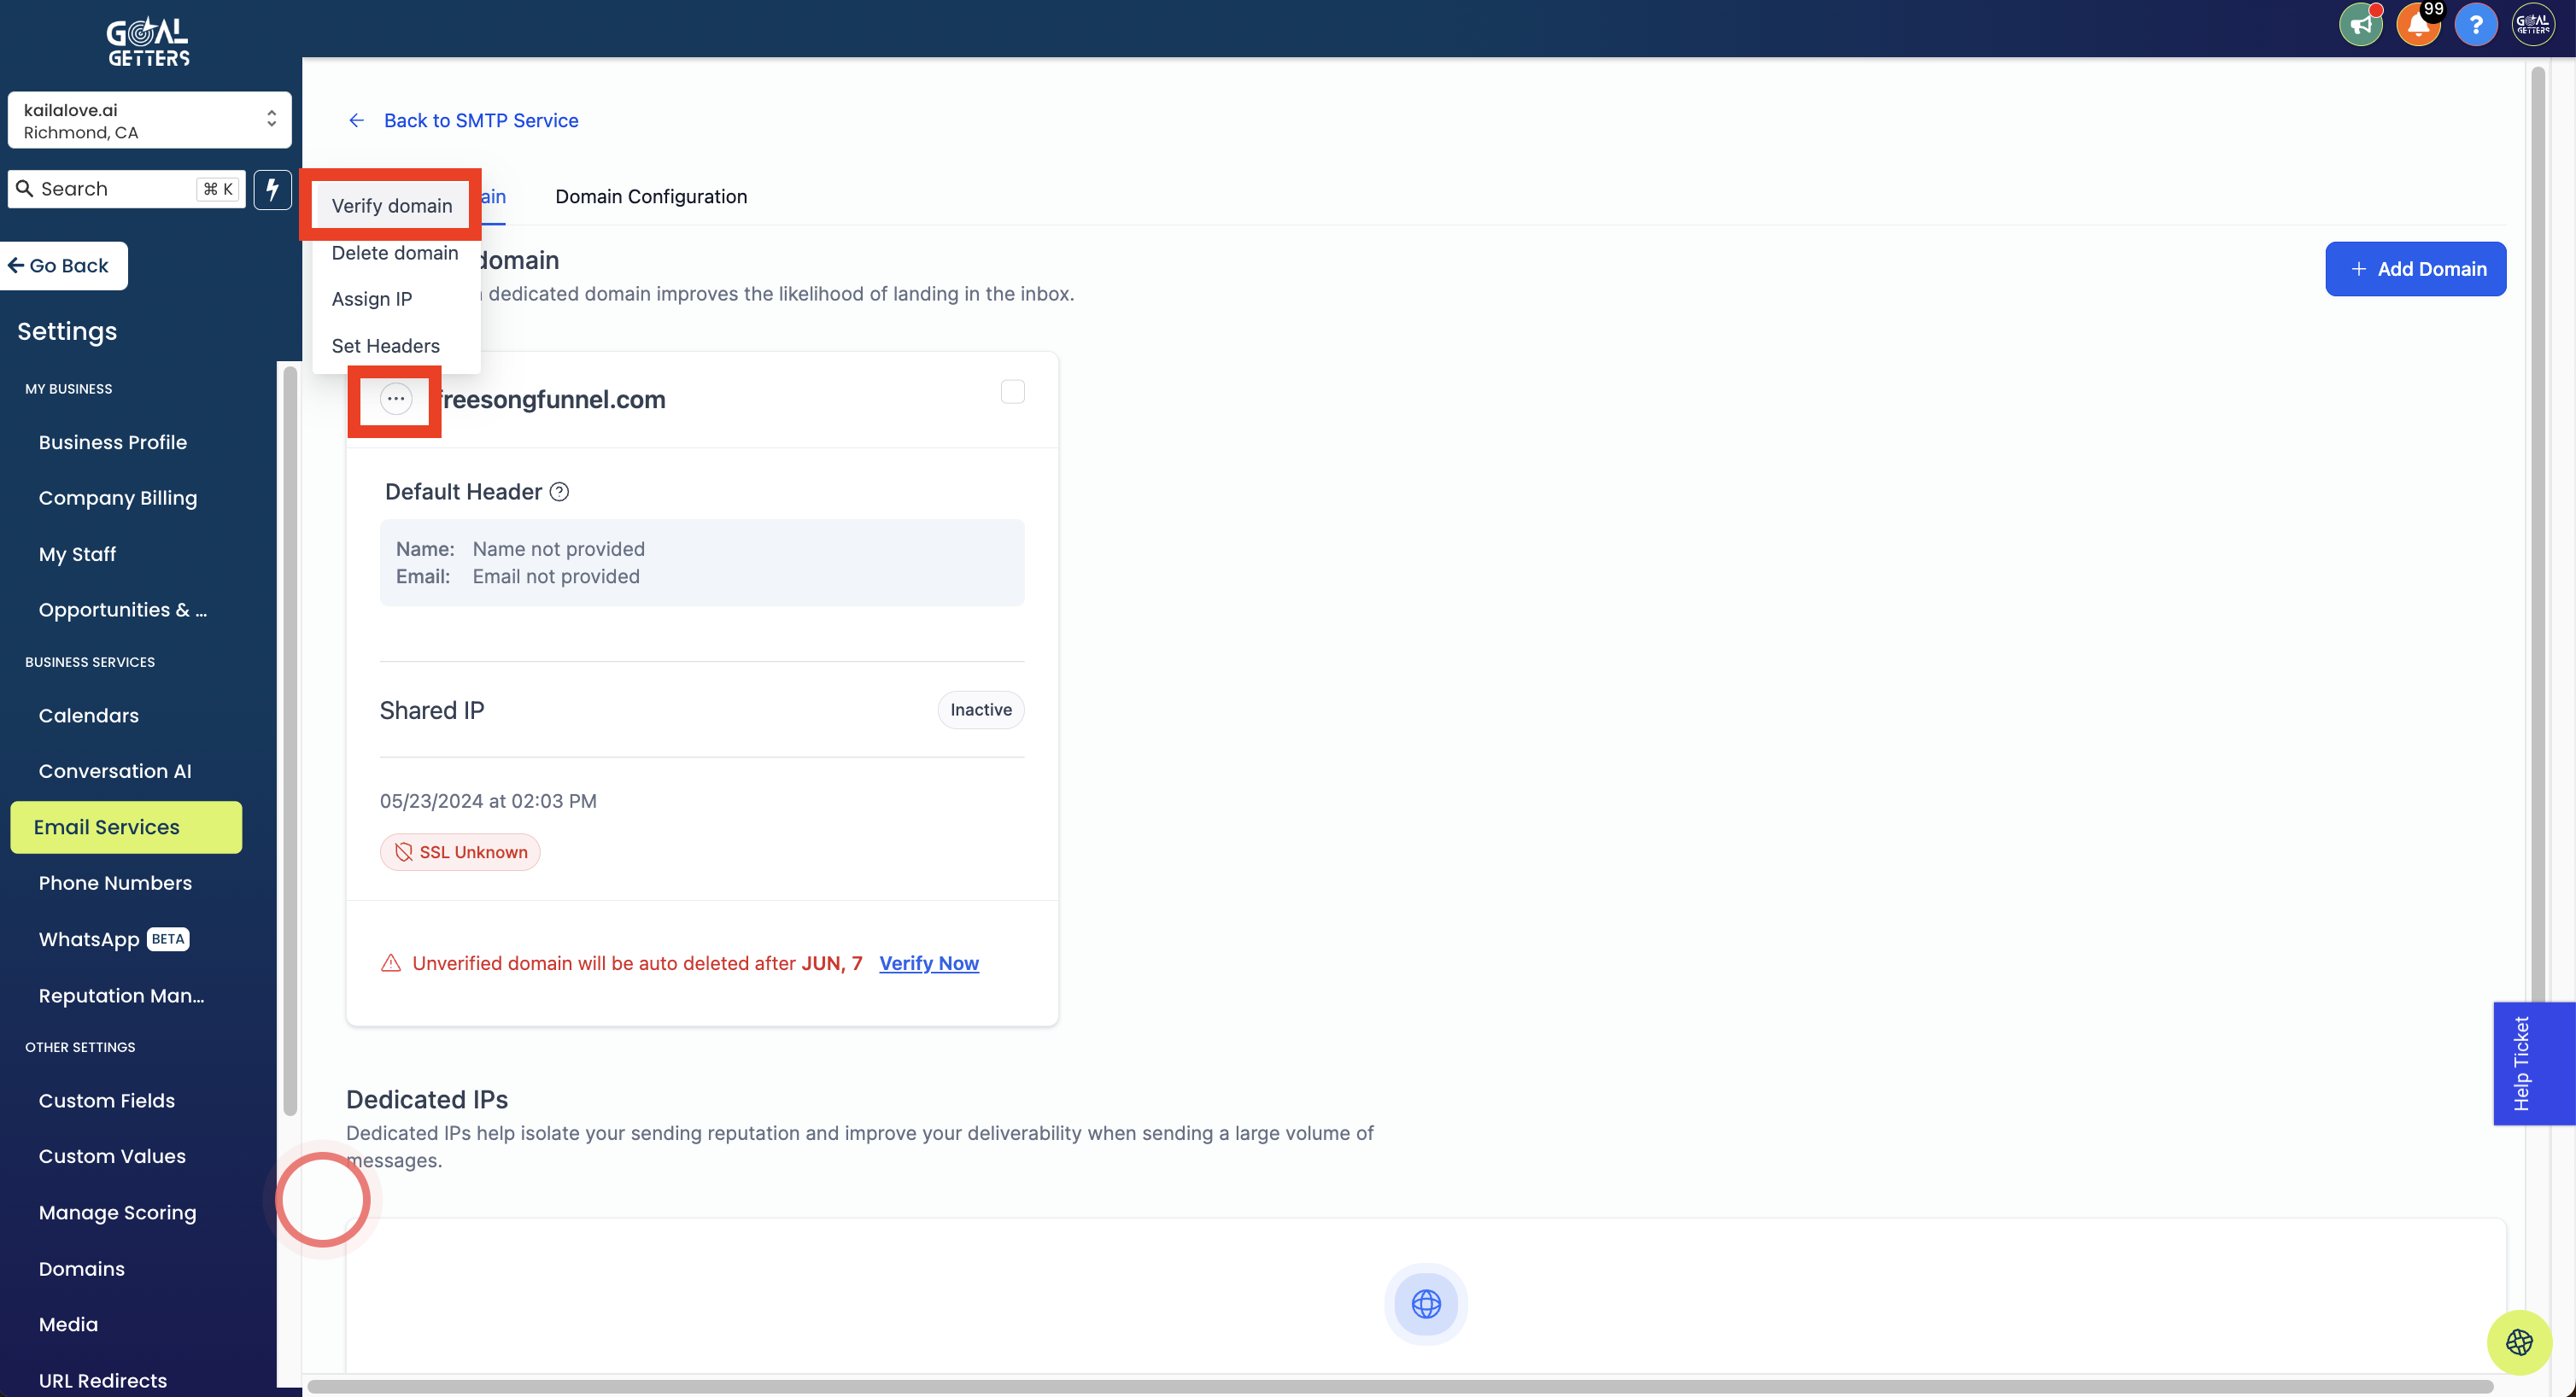
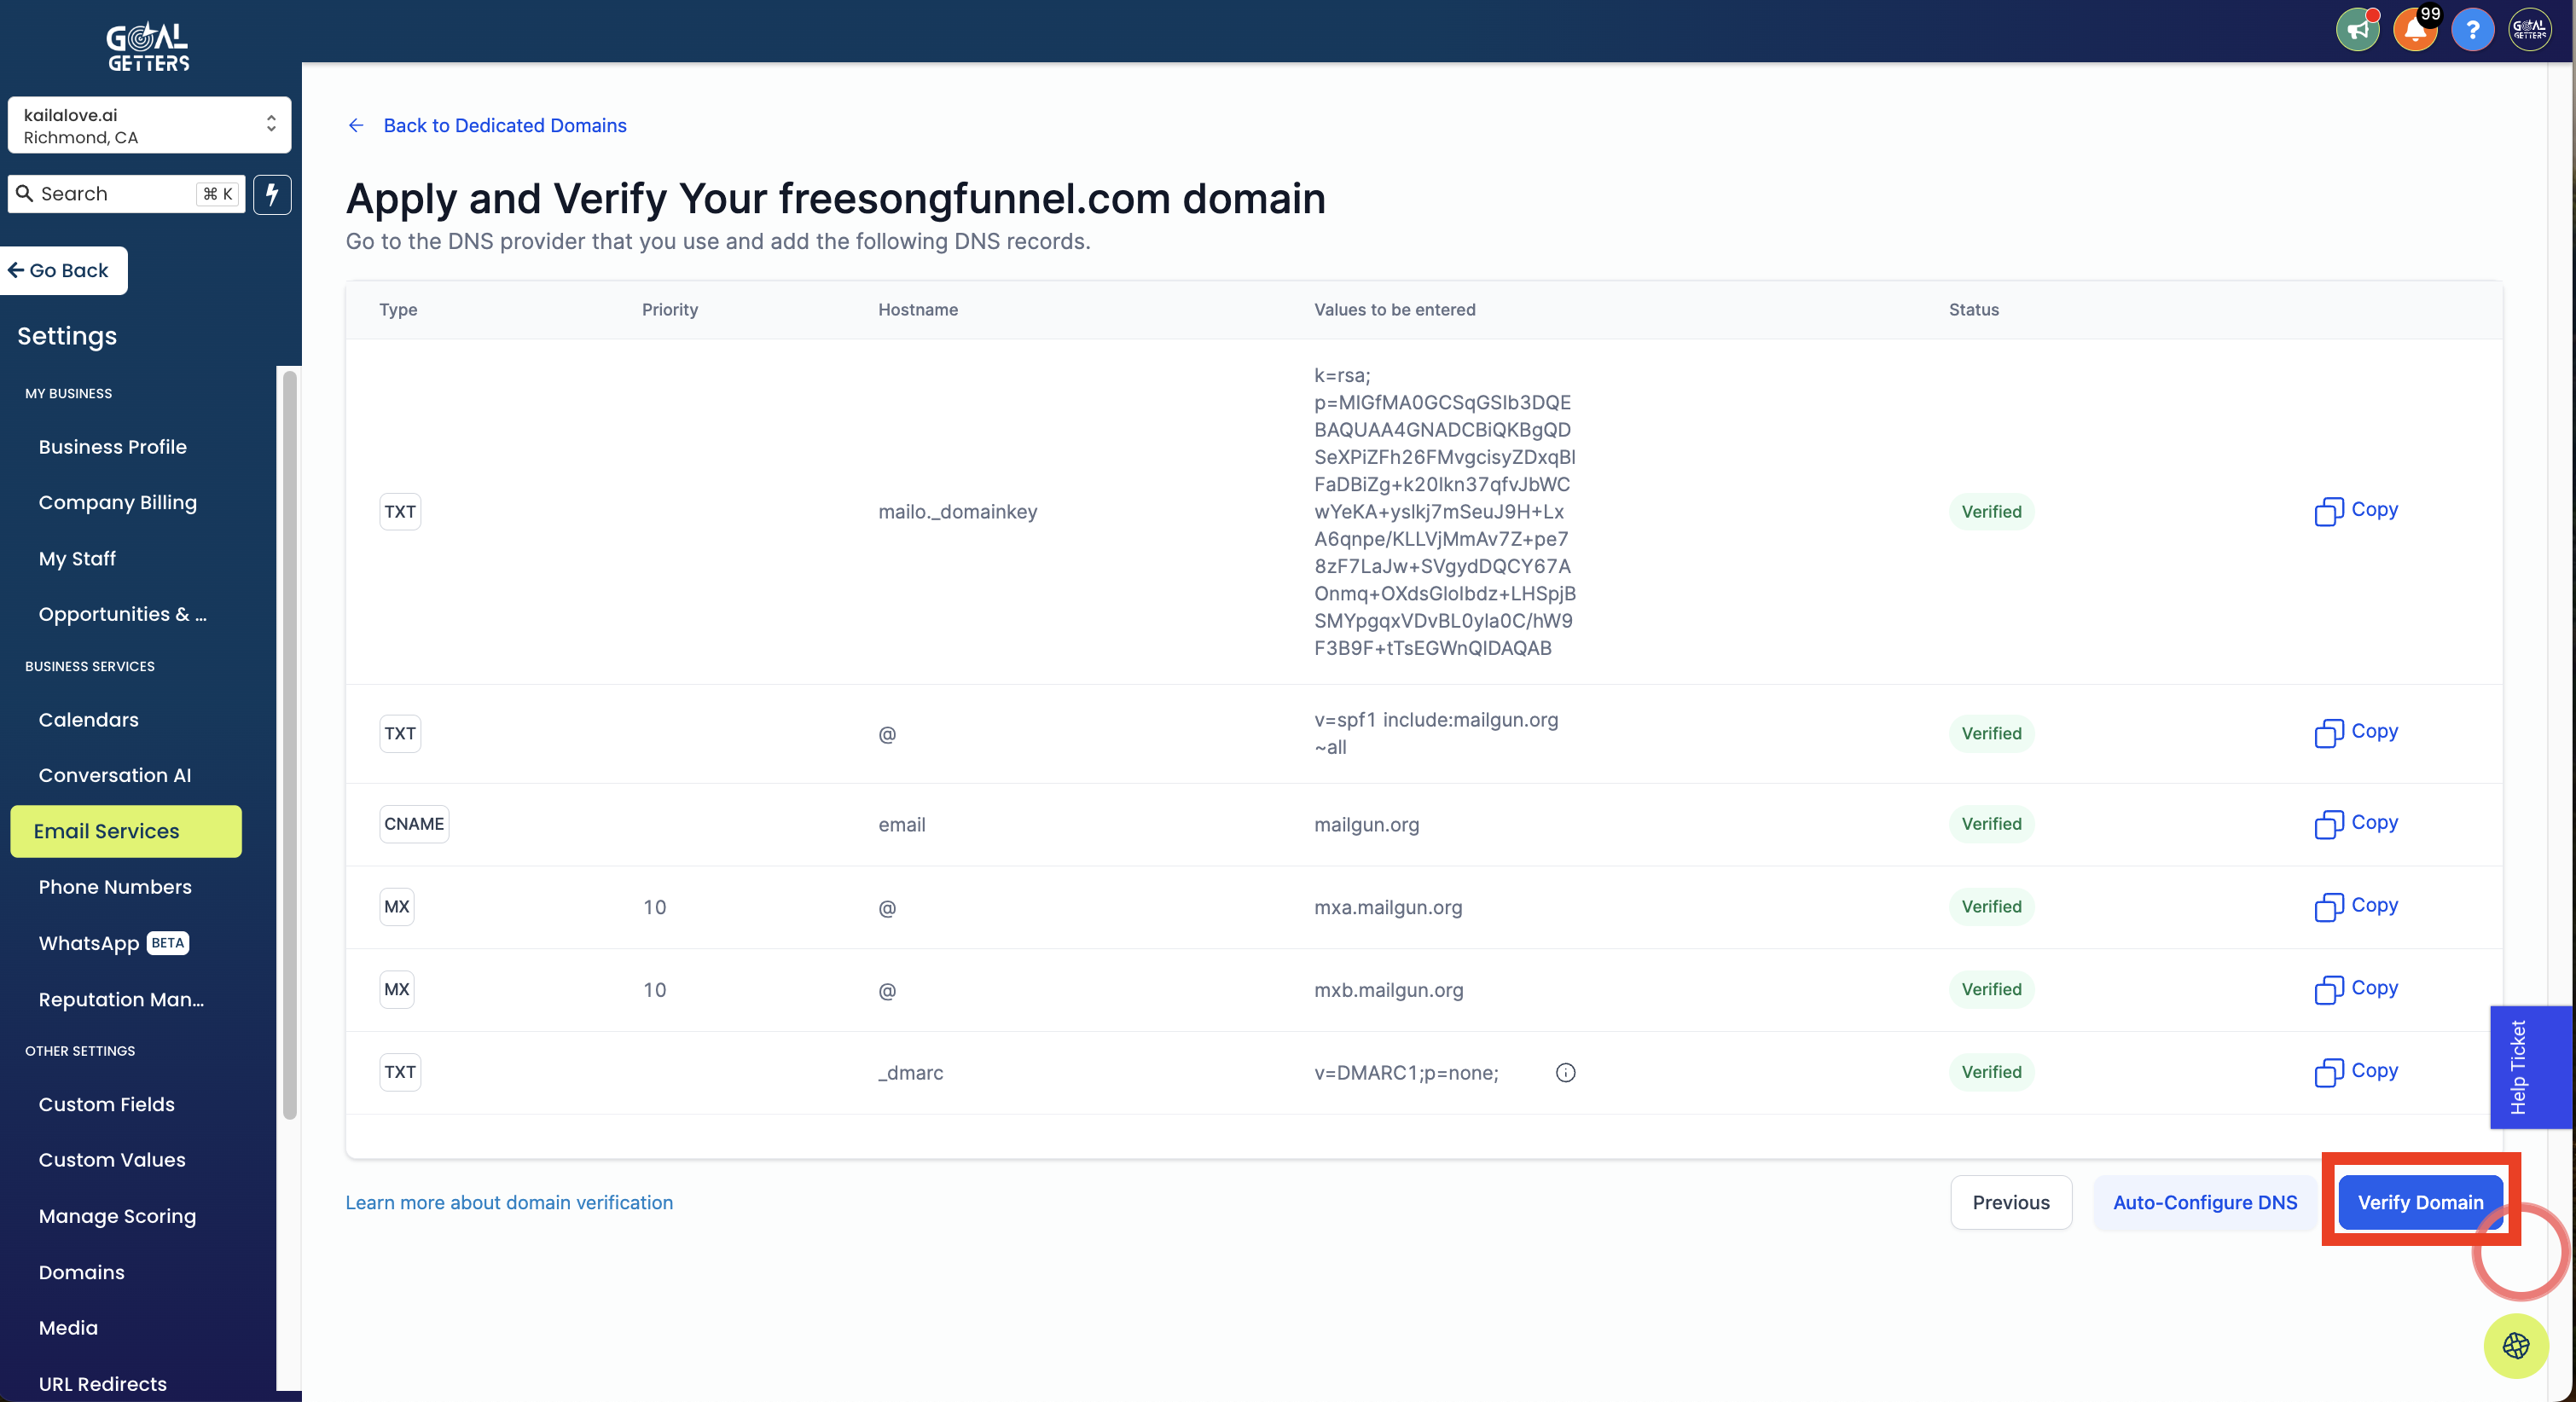
Step 11: Make sure to click "Verify Records" a final time (once you see green on all your records):
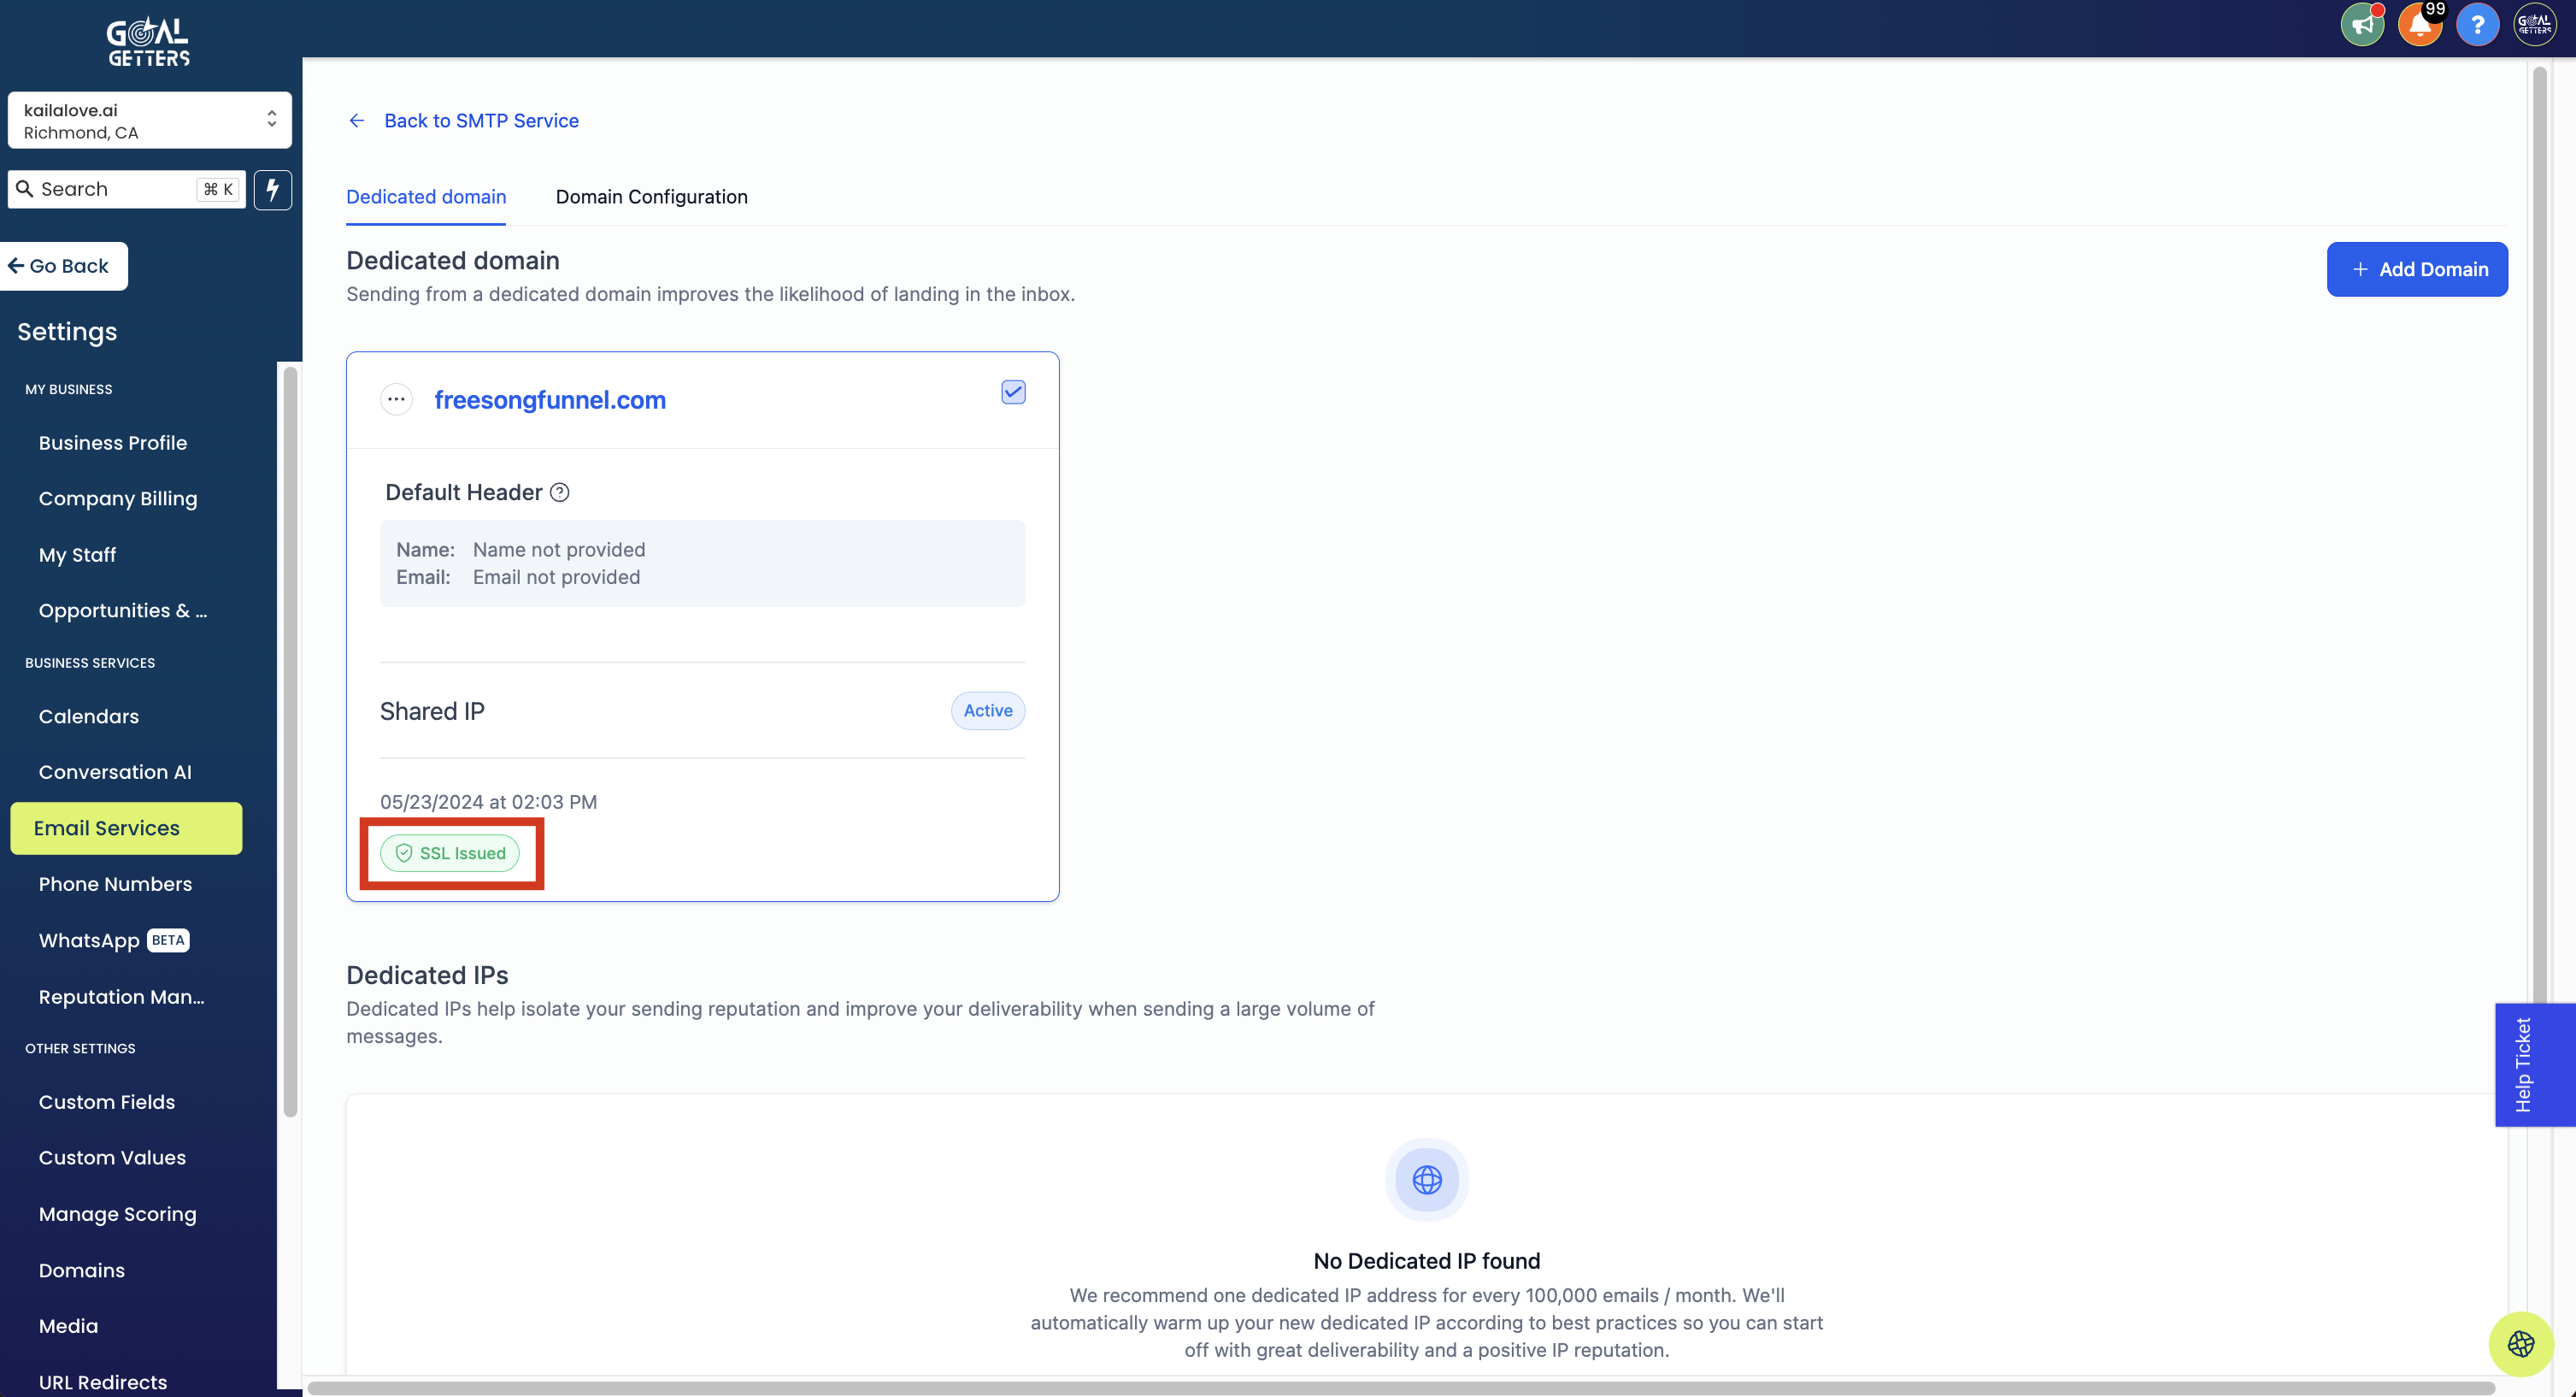
Step 12: Confirm that your dedicated sending domain is successfully verified by ensuring that the label saying "SSL Issued" is marked in green. It will look like this (below). Note: it may take a few minutes to generate the SSL certificate, so if you don't see it right away, just check back.
That's it! You're dedicated sending domain is now verified! Now you're ready to move on to the next step of setting your heads and forwarding your emails to your personal account!
PART II: Setting Your Headers (Step-by-Step Directions with Screenshots):
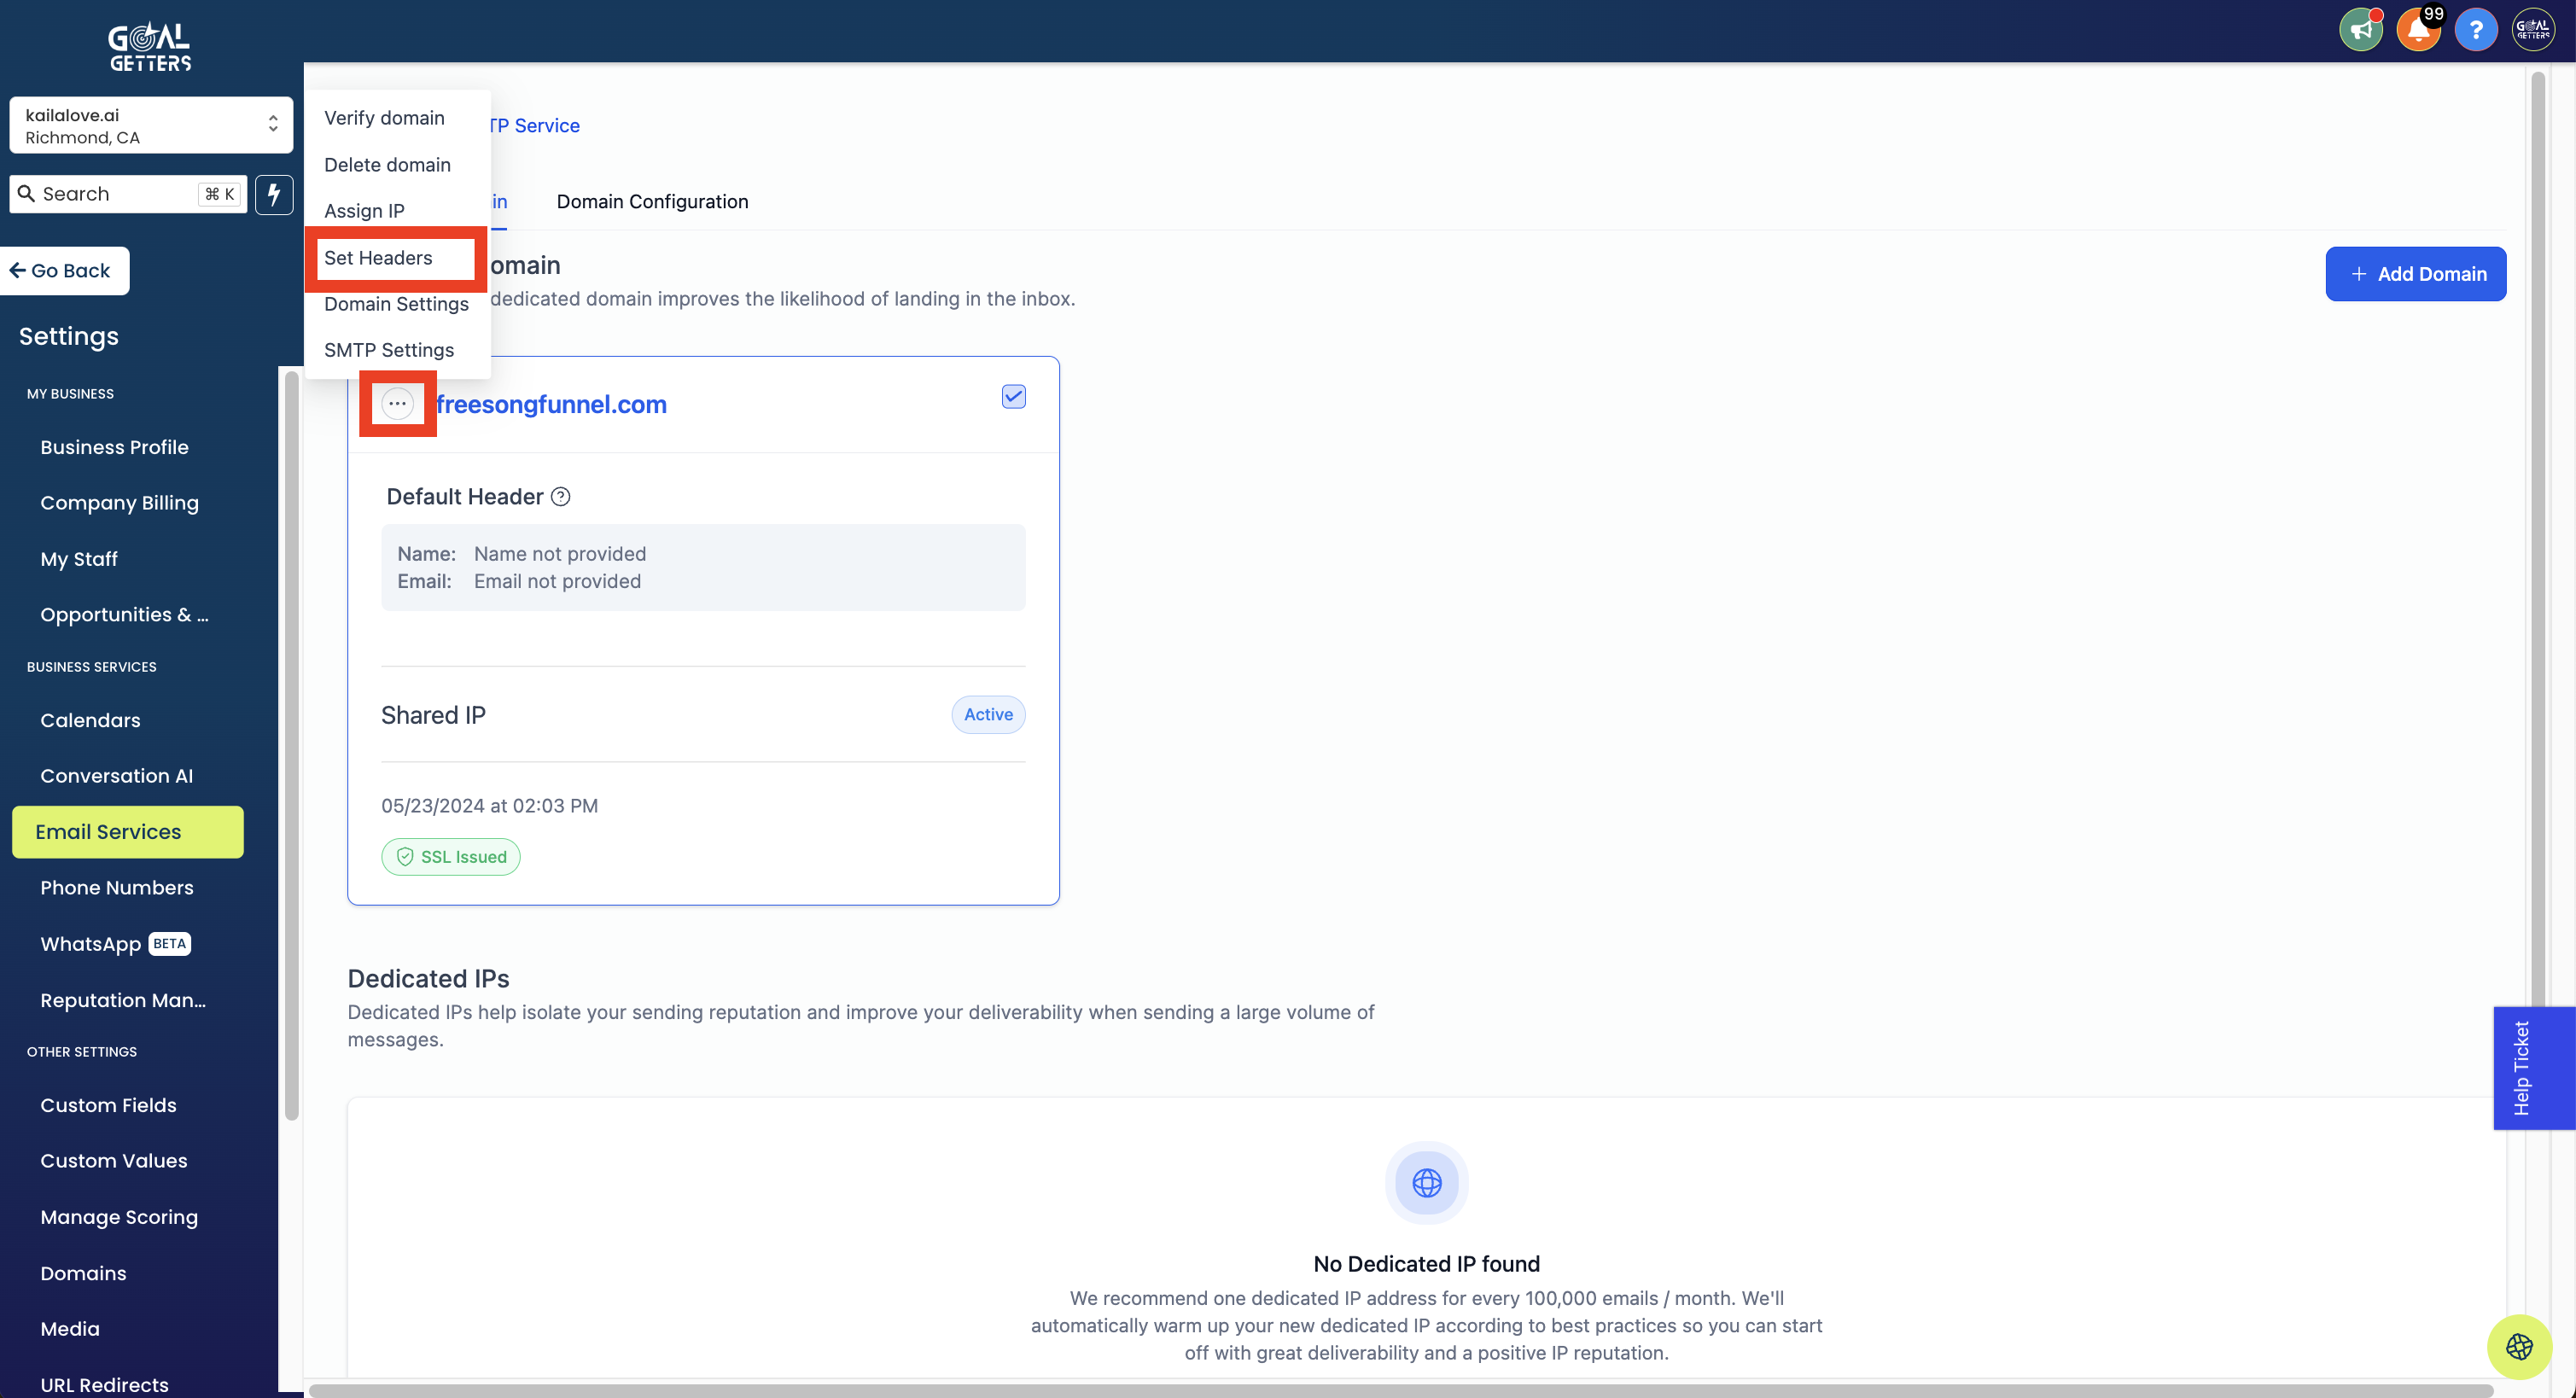
Step 1: Under your now verified domain, click the three dots, and the option, "Set Headers"
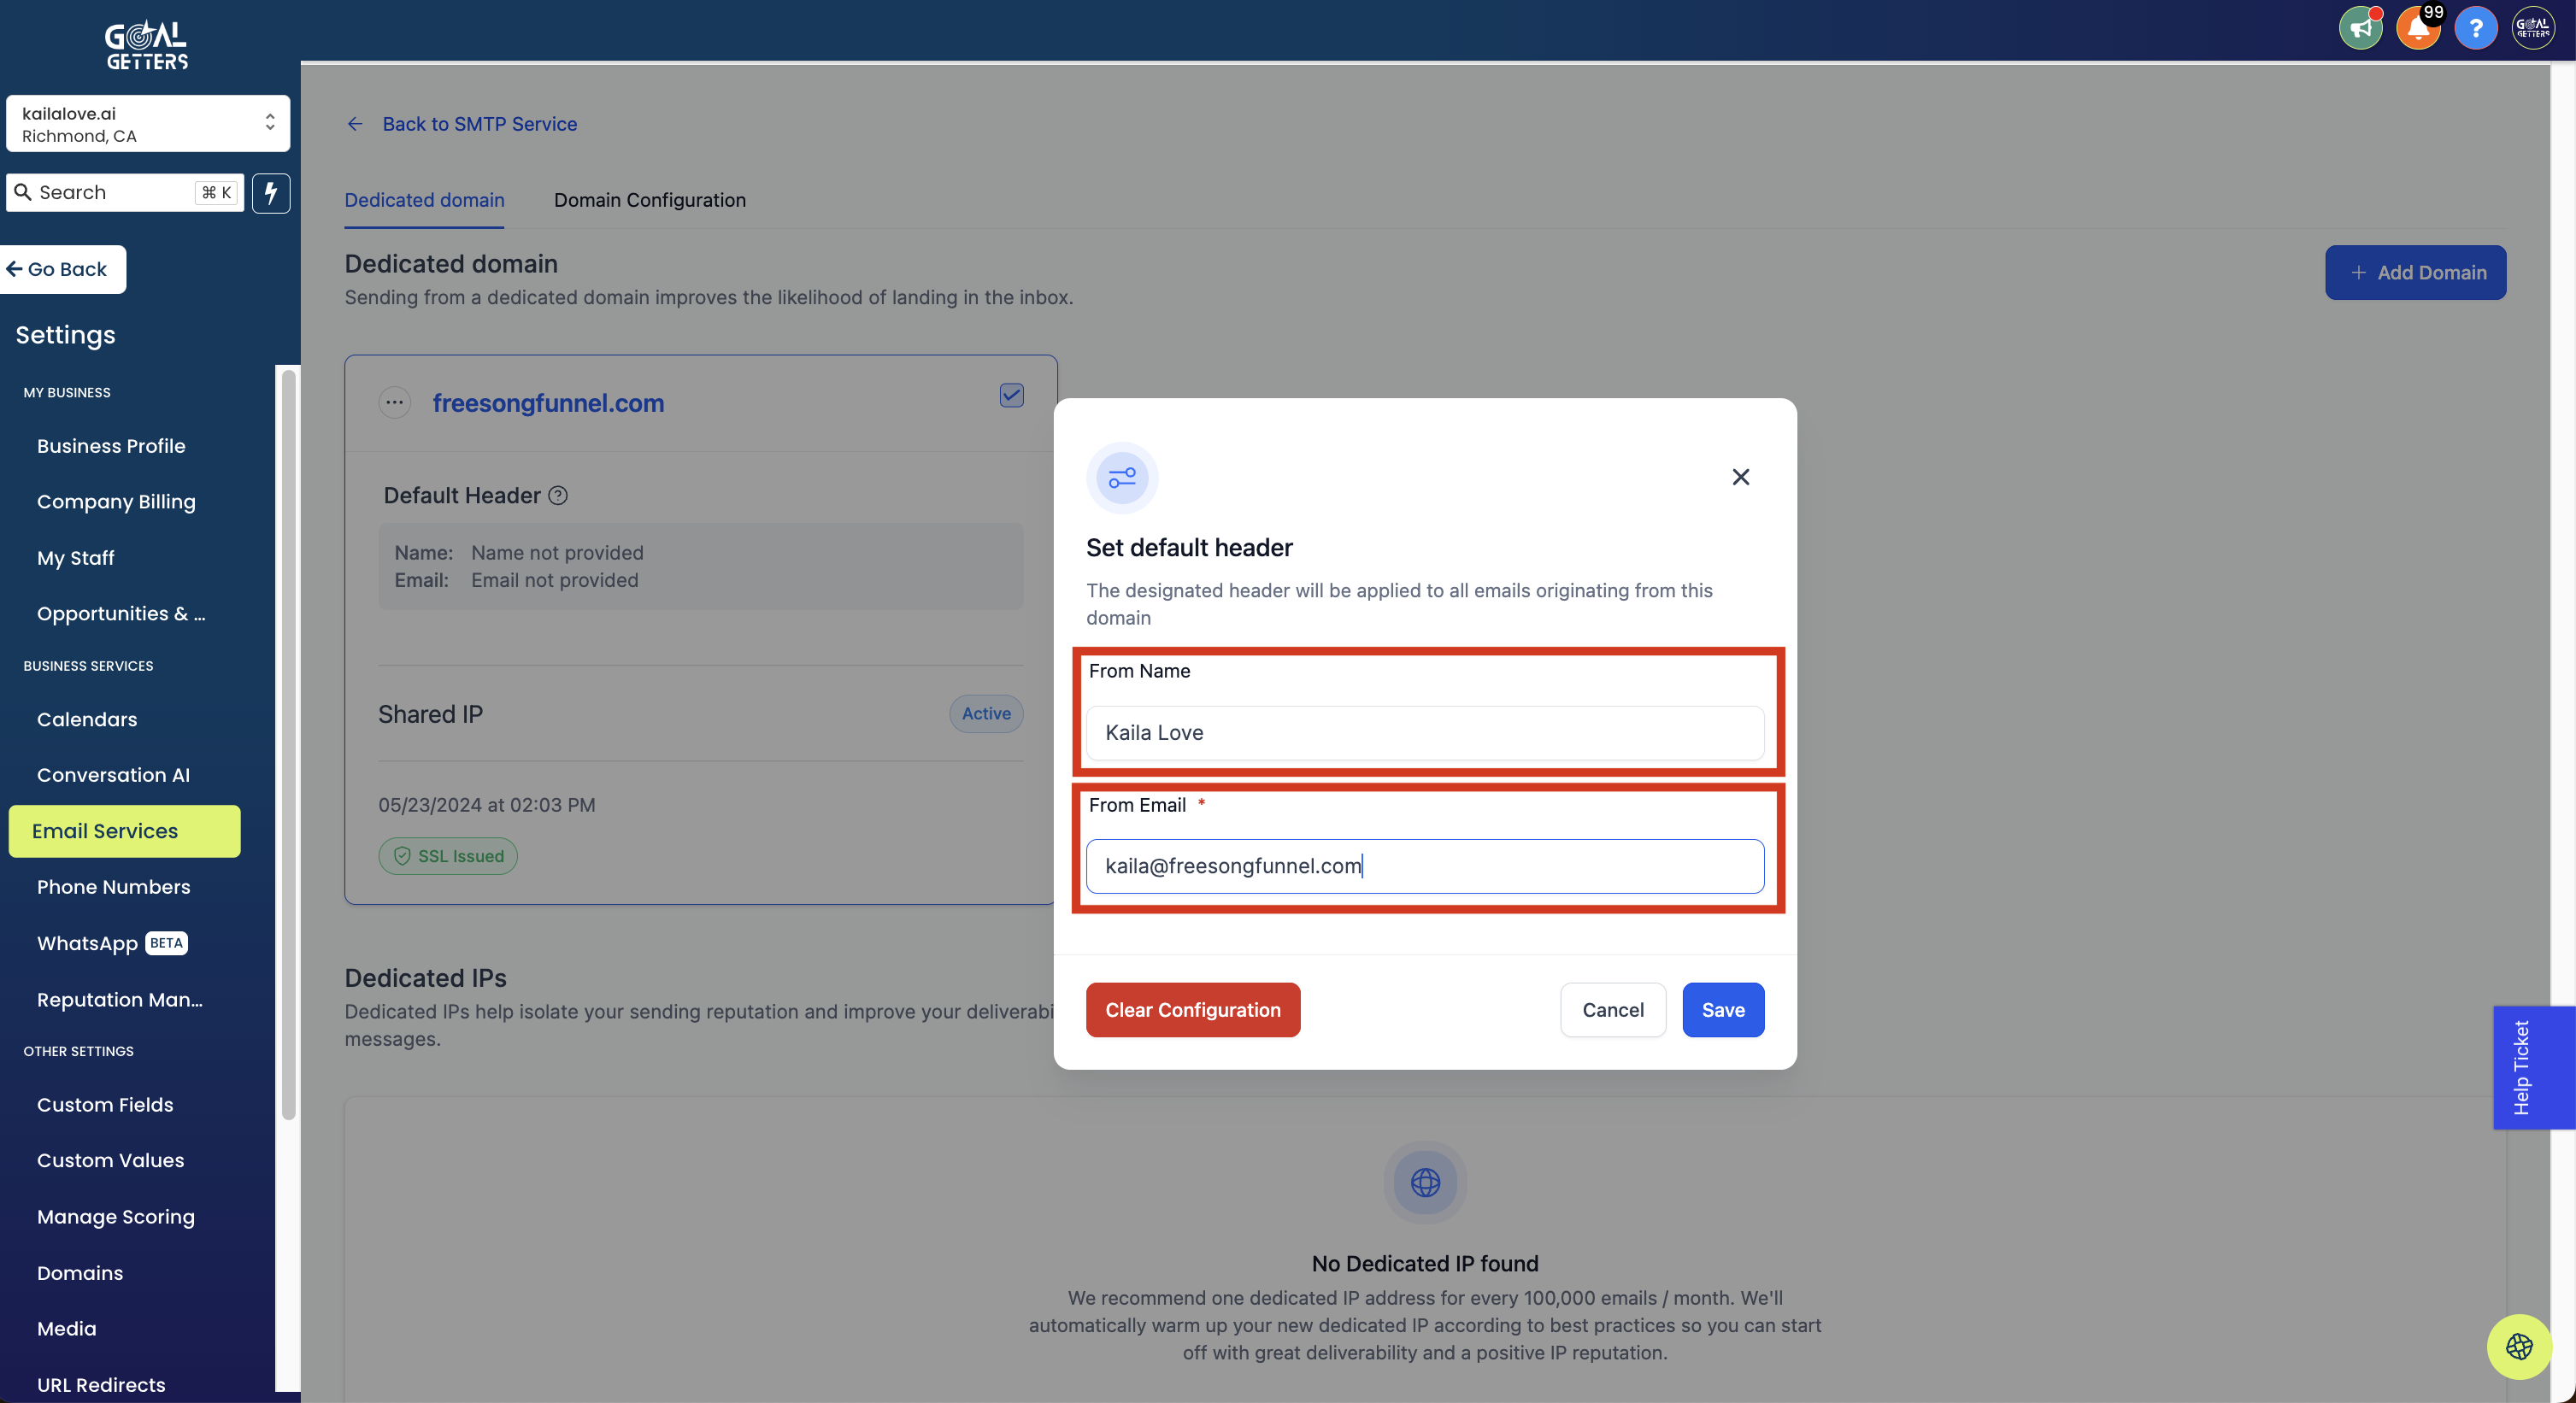
Step 2: Set your name and from email. This is the name and email that you want to show up as the "from" for all the emails you send out through GoalGetters.
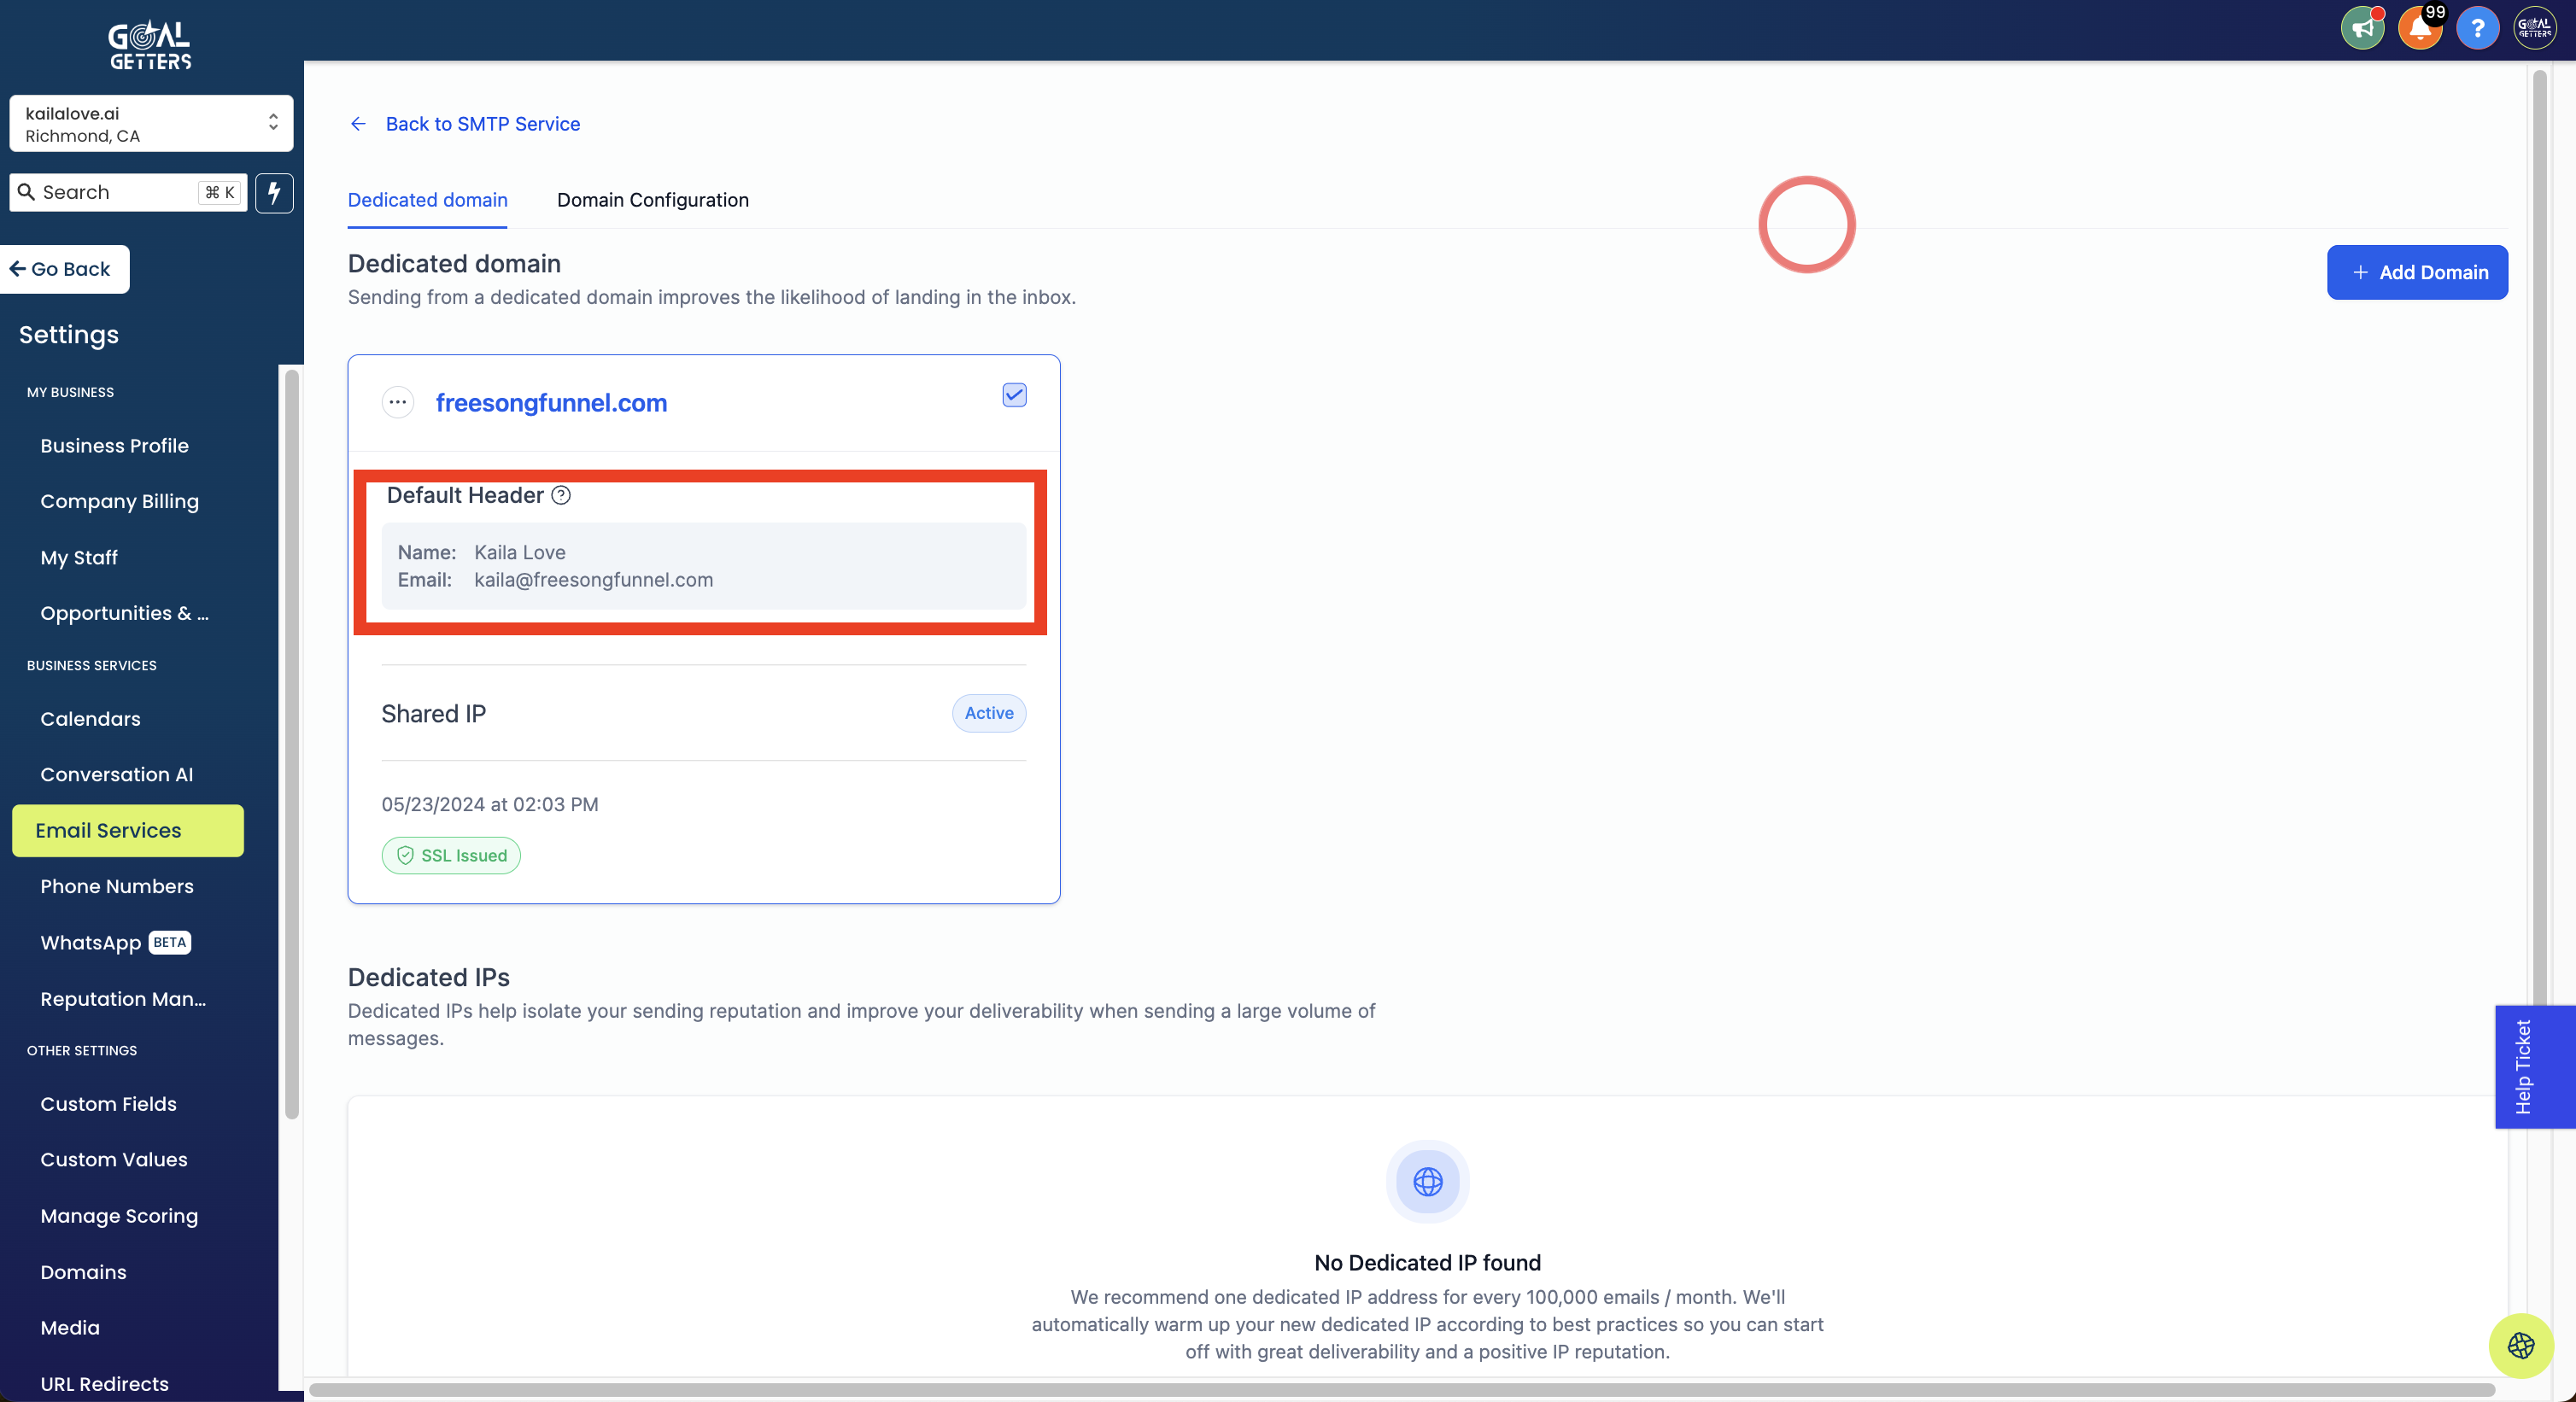
Step 3: Click "Save" and confirm that your headers are correct:
Congratulations! Your headers are set and now will automatically be used for every email you send out via GoalGetters!
PART III: Setting Up Your Email Forwarding to Personal Email (Step-by-Step Directions with Screenshots):
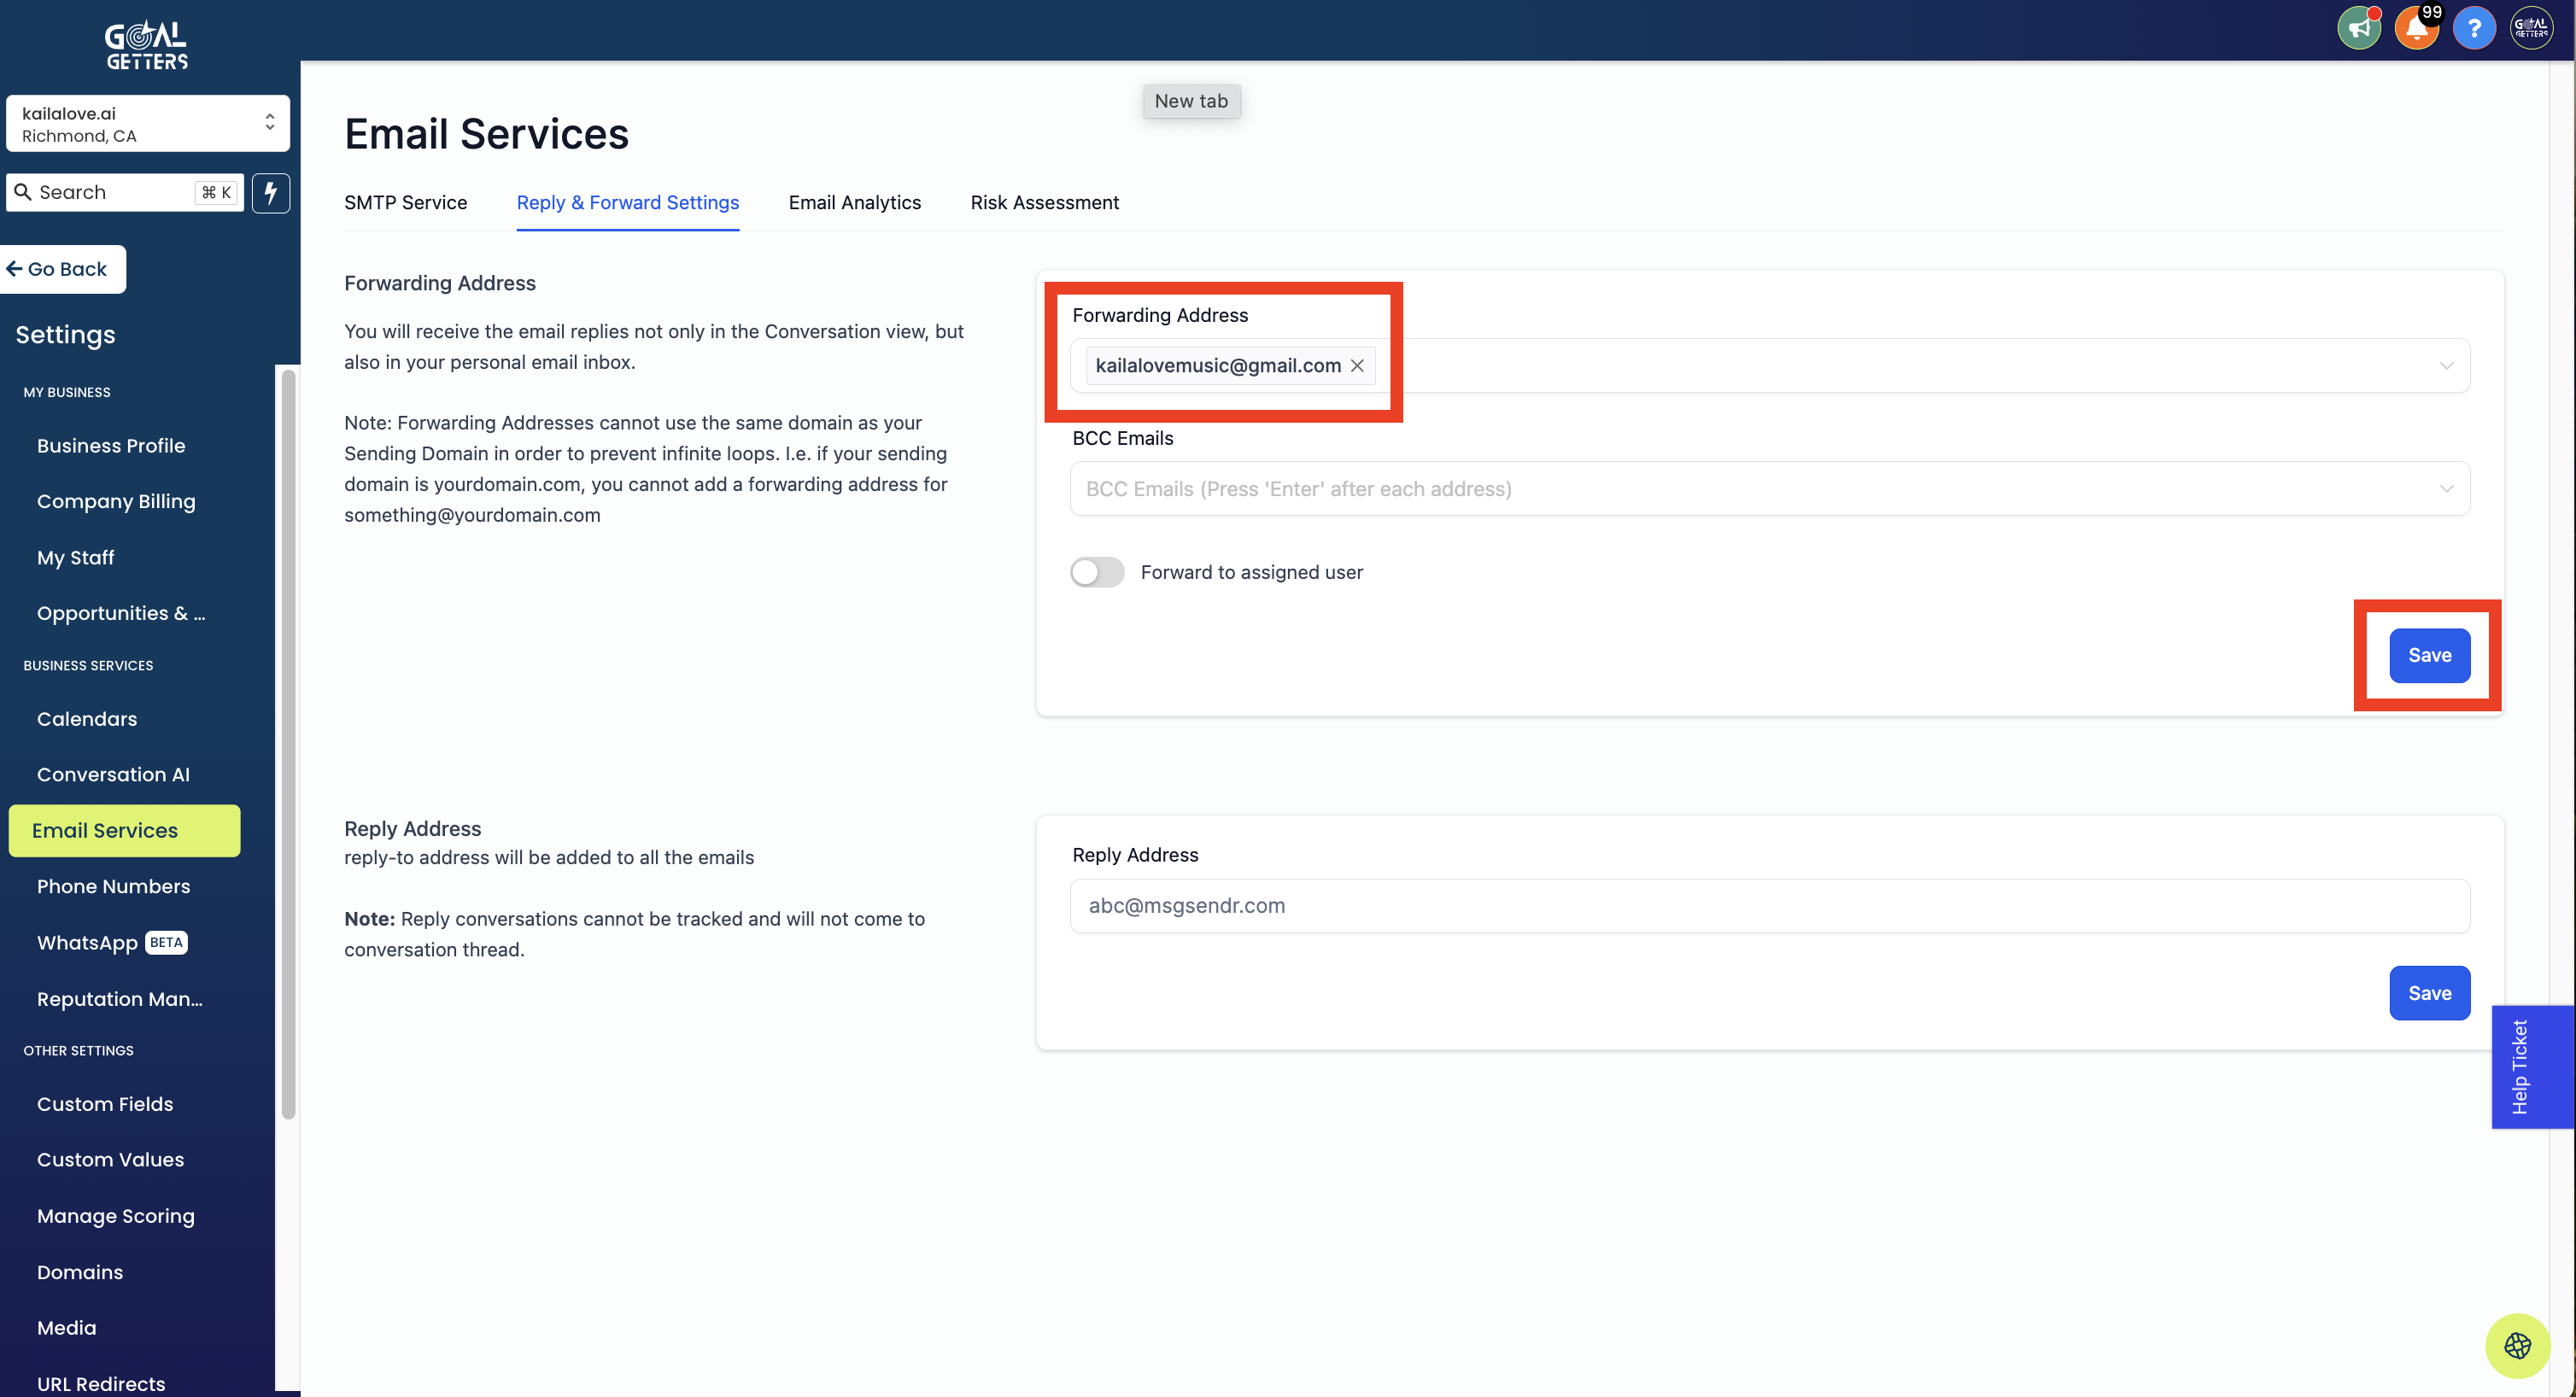
Step 1: Under Email Services (which, again, you can navigate to from your GoalGetters dashboard by going to Email > Email Settings) select "Reply & Forward Settings"
Step 2: Enter the email that you want to receive correspondence at. Make sure to hit enter so that it appears in the gray box. Then click save.
That's it y'all! We've done all we need to do :)