
How To Manually Add DNS Records to Connect Your Domain (Namecheap Example)
If you're not seeing the one click integration like with Cloudflare and GoDaddy, then you will need to manually add your DNS records. This article will walk you through the process.
In this example, I used NameCheap. The layout and menu may appear different depending on what domain provider you have, but you just want to look for your (1) list of domains and (2) DNS Records for the domain you want to connect (Sometimes it's labeled as "Advanced DNS"
Step-By-Step Directions:
This guide begins once you see this screen after attempting to add a domain:
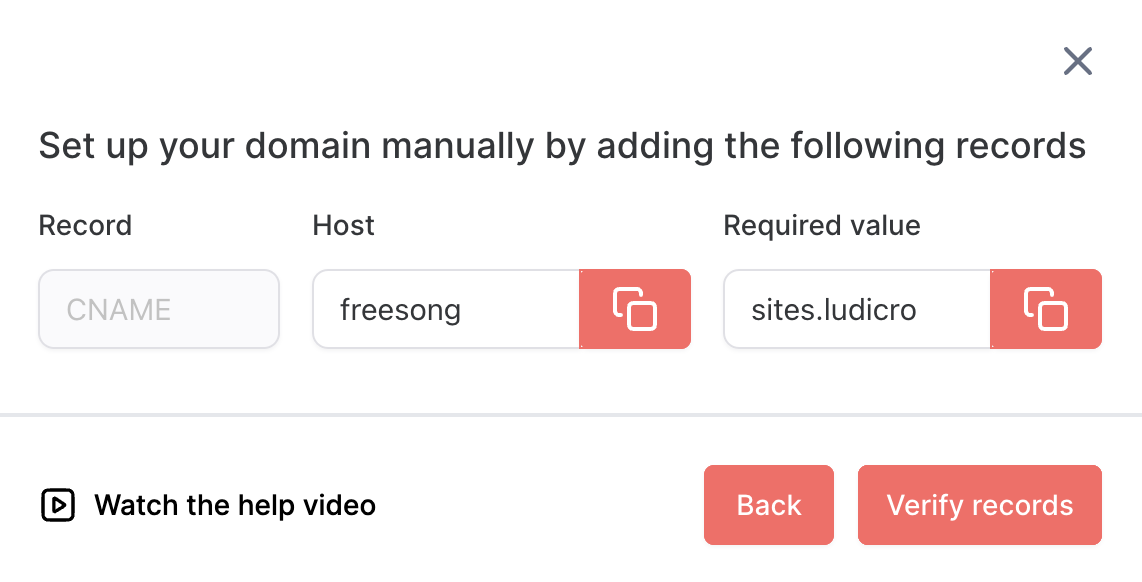
- Log in to the hosting provider's interface (e.g., Namecheap).
- Navigate to the domain list and select the desired domain (e.g., kailalove.ai).
- Go to the advanced DNS records section.
- Add a new CNAME record using the provided information (e.g., Host: testdomain, Value: sites.ludicrous.cloud).
- Save the record to ensure it is added correctly.
- Return to the GoalGetters interface and click "Verify Records" to send a signal to the domain provider.
- Wait for the system to confirm the presence of the added records (may take up to 30 seconds).
- If the verification fails, refresh the page and try again (may need to refresh multiple times).
- Once the verification is successful, the domain or subdomain is able to be linked.
- Note: This process can be applied to any hosting provider, not just Namecheap.